I love this time of year. The weather is perfect, the windows are open, and pumpkins are everywhere. When we got around to decorating for autumn, I could only pull out a handful of pieces... I guess we just don't have much autumn decor. Not wanting to spend much money (I have a big project list that I'd rather spend money on) I decided to make a quick mantel garland. After falling totally in love with Sweet Something Designs' Maple Leaf Garland, I decided to make my own version using a different method. I still suggest heading on over to her blog to see how she made her beautiful version.
Pumpkin Garland
Oven bake clay (I bought the cheap stuff at walmart)
Pumpkin or other autumn themed cookie cutter (I think bats or ghosts would be really cute! I chose pumpkins so that I could use it on into November too)
Drinking straw
Jute
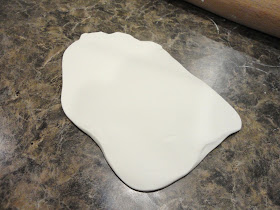
1. Knead your clay until it is soft a pliable.
2. Roll it out to about 1/4 inch thickness.
3. Using your cookie cutter, punch out as many of your shape as you can fit.
4. Using a straw, punch out holes to thread your jute through later.
5. Smooth rough edges with your finger and place them on a baking sheet.
6. Bake according to package instructions to make them hard.
7. You can paint them different colors if you want, or you can just apply a coat of sealant. I didn't do anything, I left them as is, but I think it could be cool to distress with a brown glaze. Some other options could be to add texture before you bake it. Think of the possibilities!
8. String them on some jute rope and hang for all to see!
(okay, so mine kind of look like sand dollars... at least I like the look of sand dollars...)
The best part is that this project takes very little materials, time, and clean-up and your options are limitless!


No comments:
Post a Comment