Showing posts with label Painting. Show all posts

9.18.2012

Simple Pumpkin Canvas

Today the weather has been amazing. It's cool, there's a light breeze, and this just feel more like fall. I told myself I wasn't going to decorate for fall until October arrived, but with the weather today, I couldn't hold out any longer. I went up in the attic and pulled down what little we have for Fall, Halloween, and Thanksgiving. It was minimal at most. So I rummaged through my wood scrap pile and pulled out some leftover orange burlap to whip up this quick little project. (Sorry no pictures of the process.)


      What you'll need:
  • Piece of wood, any size you want.
  • Burlap to wrap around wood.
  • Staple gun & staples.
  • Contact paper.
  • Pumpkin outline printable (see below).
  • Scissors or exacto knife.
  • White craft paint.
  • Paint brush- I actually used a circular sponge stamper brush...


      How to:
  1. Iron any big creases out of burlap.
  2. Lay burlap on floor, and place wood on top of it.
  3. Wrap burlap to the back of your wood and staple in place. I staple parallel sides one after the other, and then switch to the other parallel sides, pulling taut as you go, but not too hard since burlap is a loose weave.
  4. Print out pumpkin to fit on your canvas with border room.
  5. Cut a piece of contact paper to fit the size of your board, trace pumpkin onto contact paper, cut out pumpkin, and set aside. Using the left behind contact paper, peel off backing and adhere to your burlap wrapped board. Make sure to press down well especially around the inner edges.
  6. Paint the negative space with white paint. With my circular sponge brush I dabbed paint, do not brush from side to side or the paint may seep under the edges of your contact paper.
  7. Once painted you can carefully remove contact paper.
  8. Set project aside to dry.

Enjoy!


Click on pumpkin above or HERE to download your pumpkin outline.

9.10.2012

Silhouette Project: Canvas

On of the many ways that I've put my kids' silhouettes to use was in a quick and easy canvas project. 

Here's how to do it:

1.  Print or trace the silhouettes onto contact paper (cut to a 8.5" x 11" sheet and run through the printer just you would with paper.)
2.  Cut out the silhouette using an exacto knife.


3.  Adhere paper to canvas (I had to spray some extra spray adhesive to the edges to make sure it stuck good since contact paper is meant to not be super sticky.)
4.  Spray paint canvas making sure to get a good coat around the edges of the silhouette. I faded it out to the edges though it's hard to tell in the pictures since I used a metallic paint.


5.  Let dry. The edges of my stencil curled up as it dried making it easy to remove.
6.  Hang your canvas for all to enjoy. I plan on adding the kids names to their canvas, but haven't decided yet how I want that detail to look. So for now they simply hang above our dresser, and I love seeing their cute cheeks, noses, and chins each time I change E's diaper.


I think this would be really cute in a shared kids room or in a playroom with each child's canvas sprayed with a different fun color.

8.30.2012

HELLO Entry Signage

We have lived in our home for 2 1/2 years now, and up until this week, our entry wall has been bare. I always wanted an entry that was cheery and inviting, but plain beige walls, were not the most welcoming sight. I thought about simply cutting a board and painting or doing vinyl that said "Welcome" but that was too typical for me. So I came up with this instead:

I just bought unfinished wood letters, painted them white, and distressed the edges a smidge.

Then, using Command's picture hanging strips (the velcro-like ones) I mounted them on the wall. The strips make the letters pop away from the wall just a tad, adding a little more dimension, which I love.

Hopefully now, when people come over, they will feel happily welcomed into our home!


What do you have in your entry?

6.28.2012

Pallet Wood American Flag

Back in April I had this vision of a pallet wood American flag. Well actually, at first it was going to be a store bought wood flag, but I really wanted the distressed look to it. Then I realized, rather than me roughing up some smooth fresh boards, why not use boards that are already rough. So, the kids and I went pallet hunting. 

That thing was clean compared to the other options, but it still was quite dirty. I hammered and tugged and jumped on it until I got all of the boards separated. I ended up with 9 usable boards. Then I had to remove all of the gross nails. Then I sanded off the dark and dirty spots so that the paint would adhere good. I cut two of the boards down to 24" to put on the back to nail the front boards to- I just used the preexisting nail holes on the outer edges when I nailed it all together. The flag measures 25" x 40". 

I did all my work on the garage floor. I dream of a day when I can have a work bench with all of my tools in their own glorious places, but for now the floor works just great!

Then I gave it a rough while painting. I didn't worry about it being thick on the upper left corner because that would get painted blue.


Then, I taped off my stripes, and painted in between them red. After the red was dry, I taped off for my blue section, painted it and let it dry. After it was all dry and tape was removed, I sanded it all down to expose some wood and some of the white paint underneath. It looks nice and rustic and very patriotic.


I've considered putting a star in the upper corner, but until I figure out  the right one, I think it looks great just simple and plain.

6.25.2012

T-Shirt Painting for Kids

Each day of the week we have a theme. Monday is Make Something Monday. So far this summer, we've baked fun dinners and yummy treats and made puppets. So today's project was painting t-shirts.


I cut out a shape from contact paper, then stuck it on the shirt. Then, I let the kids go to town with paint and circle paint sponges. I made sure that they filled in around the shape so that it would show up. We waited for the paint to dry a bit (not completely . . . we were too eager.) Then, we peeled away the contact paper to reveal our shapes. Now we just have to wait for the to dry completely. Once they are dry I will heat set the paint by ironing over each section for 30 seconds using a press cloth to protect the iron from the paint (just in case.)

You can get shirts for under $3, and we already had the fabric paint. It was an inexpensive project, but one the kids loved. The kids are so proud of their work, and I love seeing the fun they have doing it.

8.02.2011

Bedtime Routine Canvas

There was a little spot in the kids bathroom that kept asking for something to adorn it. So a few months back I made this bedtime routine canvas. 

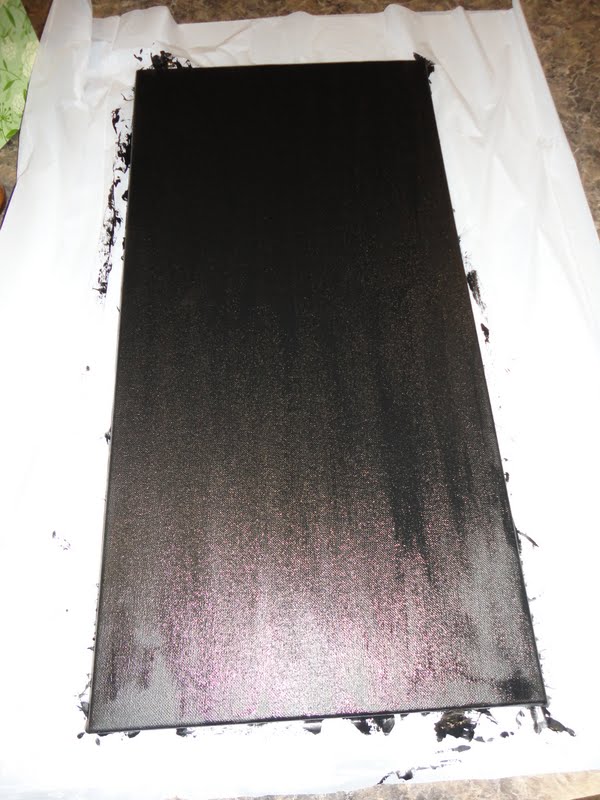
First, I painted the canvas black. When it was dry, I sponged the edges with gray to distress it a bit. 

I cut out my letters using a Cricut, then glued them on the dried canvas.


Once done, I hung it on the wall and it completed the space nicely. And now my daughter has a little checklist to go through - she's got great teeth-brushing technique!


12.15.2010

Snowflake Shirt Stencil

When I'm at a store and find plain t-shirts, (a pet peeve of mine is that you can hardly find a child's shirt without some crazy graphic on it, or even a simple graphic on it... I'm talking plain, solid, no embellishment shirts) I buy a couple because I never know when I might want to bust out a little craft project, and embellish it myself.

About a month ago, I had one of these urges. So I pulled out one of the plain, white, long-sleeved shirts I bought at Walmart (for $3.50!) Here's what I did.

1. Printed out a snowflake design onto the paper side of freezer paper. Just cut your freezer paper down to a standard paper size and run it through your printer as you would plain paper.
2. Using an exacto knife, I cut out the snowflake, being sure to keep the little circles and pieces.
3. Then, I iron my freezer paper onto my shirt with the waxy side down. Iron long enough that the wax melts and makes the paper stick to your fabric.
4. Paint your stencil. I just used regular craft paint. I love using the fabric paint because it washes up nice and soft, but if you don't have any on hand you can always use regular craft paint. It isn't as soft, and it may crack, but I don't mind the look it creates.

I did a layer of creamy beige, and then a layer of pearl finish to give it sparkle.
And a close up of it painted. 
5. Wait for it to dry. I always get excited to see the results and peel it off before it's entirely dry, and it doesn't seem to hurt- just peel off slowly.
6. Once completely dry, no rushing it on this step, heat set your paint by pressing with a warm iron for 30 seconds over each portion. If you are afraid of paint transfer, use a pressing cloth in between painted design and iron.

The results: 

We love this shirt because it's cute, yet neutral enough to wear with a lot of different things. Plus it works great as a layering shirt too. This is our little way of bringing a little snow to Texas!

9.04.2010

Sunburst Mirror

Once I finally found and completed our bedding ensemble, the next task was filling the space above our bed. We don't have a headboard as of yet, and I knew exactly what I wanted above the bed. So far, the rest of the items in our room are all square, and straight. So a sunburst or round mirror of sorts was what I envisioned. Everytime I found one I liked, I always reasoned with myself that it wasn't perfect for the price. Then I stumbled upon Sweet Something Designs tutorial for a sunburst mirror. It was destiny! I ran out the following morning to buy my supplies. I crafted during the kiddos naptime and after they went to bed at night I finished it up. In the morning I hung it on the wall and am in love. I'm not sure if I'm totally sold on the color, but that can easily be changed... however the room really needed something metallic so it really looks great.


So thank-you Michelle for filling the void with your crafty tutorial!

7.22.2009

Kid Krafts: Watercoloring

I don't know about you, but I like one-of-a-kind art work. I'm all for homemade art, especially if it's made by my daughter! Here is a fun art project I saw somewhere online a long time ago that you can do with your kids. It doesn't take long, and the results are so fun!
Supplies Needed:
-heavy paper, I used drawing paper this time. I tried this with watercolor paper before but it bleeds too much that your letter isn't as crisp.
-contact paper
-scissors or exacto knife
-watercolors
-brush
1. Print out letter outlines. I cut my contact paper to the size of a piece of paper and ran that through my printer instead of having to transfer my letter afterward. 2. Cut out your letter.
3. Stick your contact paper letter onto your sheet of paper. Make sure that the edges are nice and stuck so that the paint doesn't seep in.
4. Let your child go to town painting. You could probably use crayons or markers and get the same basic result. I stripped my daughter down to prevent "artwork" on her clothes!
5. When they have filled in all around the letter, or whenever they feel done, let the paper dry completely.
6. Once dry, peel off contact paper slowly so you don't tear your paper. You will now see your finished product!
7. Frame your artwork and hang for everyone, especially your proud child artist, to see!
My daughter loves to paint and enjoyed seeing the paint not stick where the contact paper was. She especially loves seeing her art everytime she walks by it. Have fun and keep those kids creative juices flowing!

7.09.2009

Another Baby Shower!

So I went to the cutest woman's baby shower the other day. (Did I mention that we are very-distantly related... she's the cousin of my cousin's husband...) Anyways, she is having a girl this month and I just know that this baby is going to be one adorable and stylish lady- just like her momma. I was trying to figure out what to make her and this is what I came up with.
Ever wonder what to do with all of these?

Get someone to make you one of these:

I was running out the door headed to the shower and realized that I hadn't taken a picture of it- ack, no picture!! So this picture is a bit dark and it's ready to be gift bagged up. So, if you were confused, those three little rolls aren't toilet paper (as my sisters thought when first seeing the picture...) they are three lengths of ribbon attached to the back. You just clip your bows on the ribbon and you're set!

It was my first time making a bow holder and now realize that I NEED to make one for Kiera. She currently had all of hers jammed onto a little bow holder thing I made that also houses her necklaces, ribbons, headbands, and belts... a little overloaded I'd say. Well baby Mia's turned out so cute, that I've added that project to my list of things to do.

Can't wait to meet you baby Mia!!

7.02.2009

Burlap... in a Nursery?

I bought a bit of burlap a while back and had plans on turning into a table runner for our coffee table. However, after once again realizing that keeping our coffee table decorated was a thing of the past, my plans went on hold. I mean, isn't a coffee table the perfect play table for a toddler? It's just their height and it's right were all the action is. So that burlap has been sitting on my shelf, just staring at me, wondering when he'd get his chance to shine.
-----
On another, seemingly unrelated note... the kids' nursery is way too pink. Some things (flokati rug, pink curtains, paper lanterns...) are slowly being banished from the room into boxes, knowing their life will come back once K has her own room. But with a little brother entering the picture, we decided to save him from all the pink. Anyways, there was one piece of furniture that couldn't just be packed away- the toy shelf. Unfortunately, that too is pink. I glanced at it last week and had dreams of buying a new one... but then got an idea- a burlap bookshelf runner. I immediately went to work and came up with this:
The burlap goes well with the casual nautical theme, and the white letters make it PLAYful! Biggest plus, it covers a bit of that overwhelming pink!

5.12.2008

Divergence

So I decided to add some variety from the usual sewing of clothes for K, myself, or my shop and go back to my former life of bag making for a day or so. Both were given away to some special people in my life. We all know that I don't need another bag, although I will probably add some more to my personal bag collection shortly. Here are two of the bags I made:

The other divergence was this little dessert plate. My mom collects them, and what a better way to add to her collection than with a one-of-a-kind plate made by her family. I had painted a lot of things for K's room back almost a year ago and I forgot how much I love to paint. It took a while to get K's handprint because she just wanted to play with the paint, but eventually this is what we turned out:Another non-clothing item that I made is this lovely apron that I made for my mother-in-law. It was a pattern I came up with as I went and love the fabrics and the little flower. So far she has put it to good use!!Also, while going through my pictures I stumbled across this picture. I made this itsy-bitsy graduation gown for a friend's baby whose daddy just graduated. He was able to carry her across the stage dressed in her very own graduation cap & gown to match daddy! This was a fun project!!
So here's a challenge to switch it up every now and then to add some spice and variety to your crafting!!

1.26.2008

Wooden Sign

I always saw many cute wall hangings at boutiques, so I decided to make one for K. They do wood cuts at Lowes for $.25 and then I just painted the rest. I matches her bedding so cute!

Wall Hangings

Here is a picture frame that I painted and distressed. There is a pink ribbon that it hangs from. We have three of these hung together- one of daddy as a baby, one of me as a baby, and one of K as a baby. Distressed edges.
This is what the frames hang from. I painted these and added the line & dot detail.

Wooden Name Letters

This one shows the destressing on the letter edges.

Amazon Affiliate