Showing posts with label Children. Show all posts

5.26.2016

AMAZin' Teacher Gift

Here a simple little printable for all those AMAZin' teachers in your life! 
Just print and attach an AMAZON GIFT CARD. It's simple, but your teachers will love it. I mean who doesn't love Amazon?!
Just click the image above to get your free download.


2.12.2013

Valentines 2013

Last year my daughter exchanged Valentine's Day Cards with her little preschool group friends. There were 4 little girls in the group, and the Valentines were girly and fun. 

This year in Kindergarten, she gets to have a fun Valentine's Day party and exchange Valentines with her classmates. If you go to the store, there are the prepackaged cards or candy valentines. If you know me, completely store bought, just ain't my thing. Then, you go to Pinterest and there are TONS of cute ideas, but still a majority involve candy. Once again, too much candy just ain't my thing. (Side note: We have a "treat basket" at our house. We go through candy slowly around here, and still have Halloween and Christmas candy in our treat basket. So I had no desire to add to the candy intake. Cheesecake, ice cream and brownies are more than welcome though, and don't last long.) I figured a majority of the Valentines the kids will get will have candy, so they wouldn't be sad if ours didn't. Instead we came up with this:

And, of course, I had to design a little printable to go with it. Click on the image below to download it for yourself. Then, simply print at home, cut out, punch a hole at the top and bottom, have your child sign it, and slip a silly straw through the holes.
(File has been updated since the original post. Enjoy!)


We couldn't forget about her teacher! Her teacher's favorite snack is goldfish. So I had to copy the popular "FISH" themed Valentines out there, and designed this one:

Click on the image below to download your free printable. I made it print 4 to a page in case your child has more than one teacher to share their love with.


What are you doing for Valentine's Day?

12.11.2012

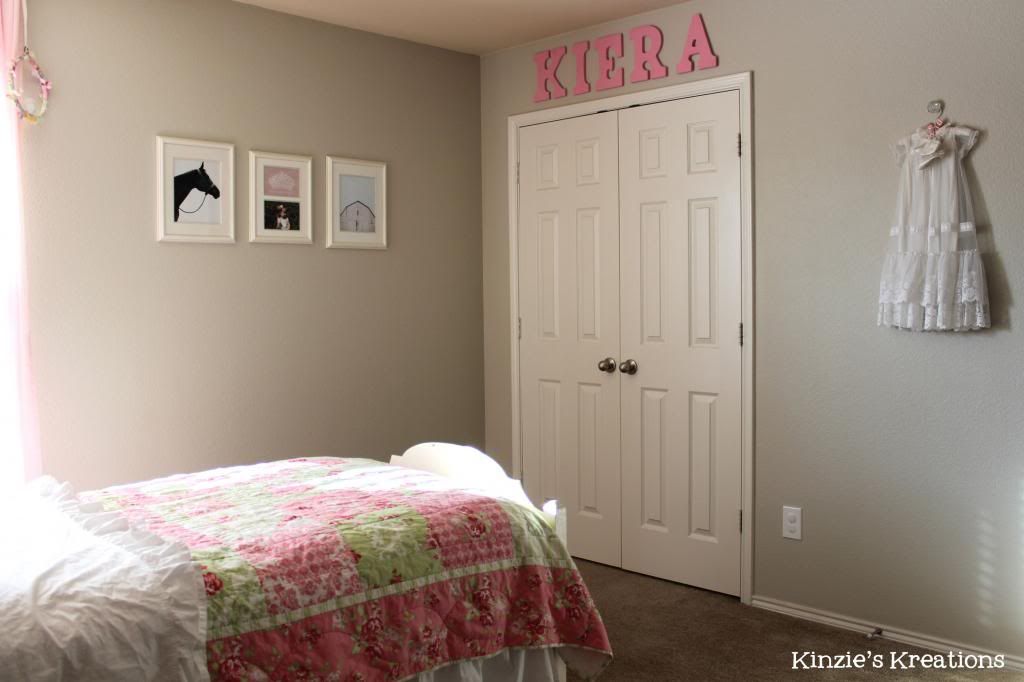
My Daughter's Bedroom

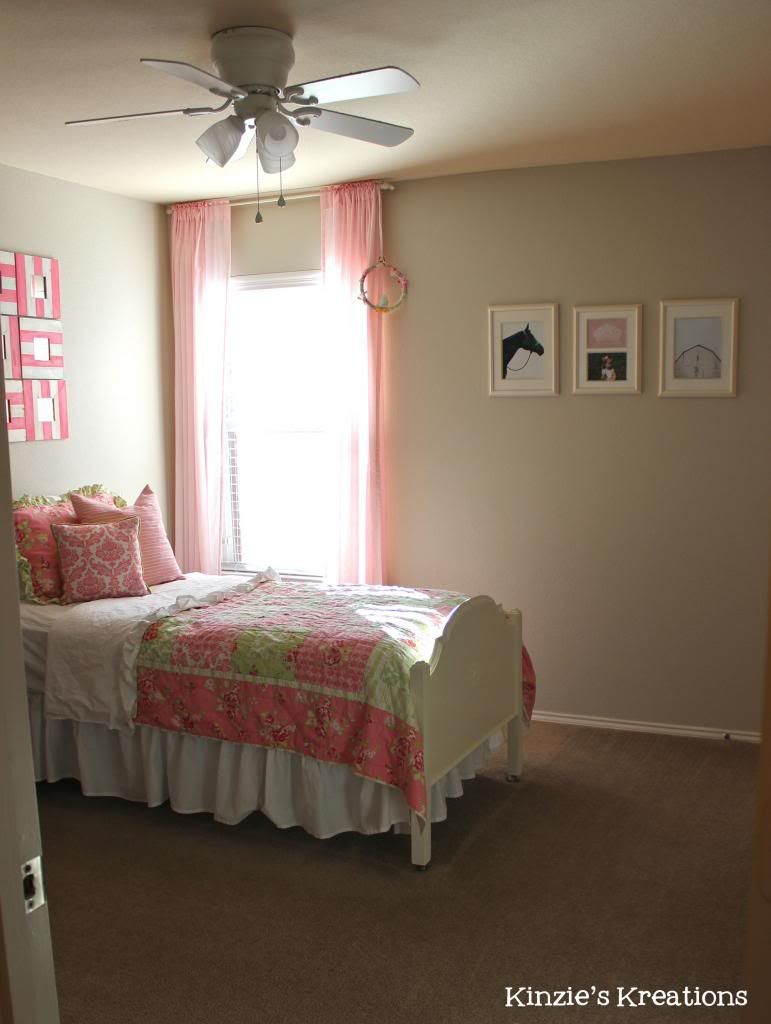
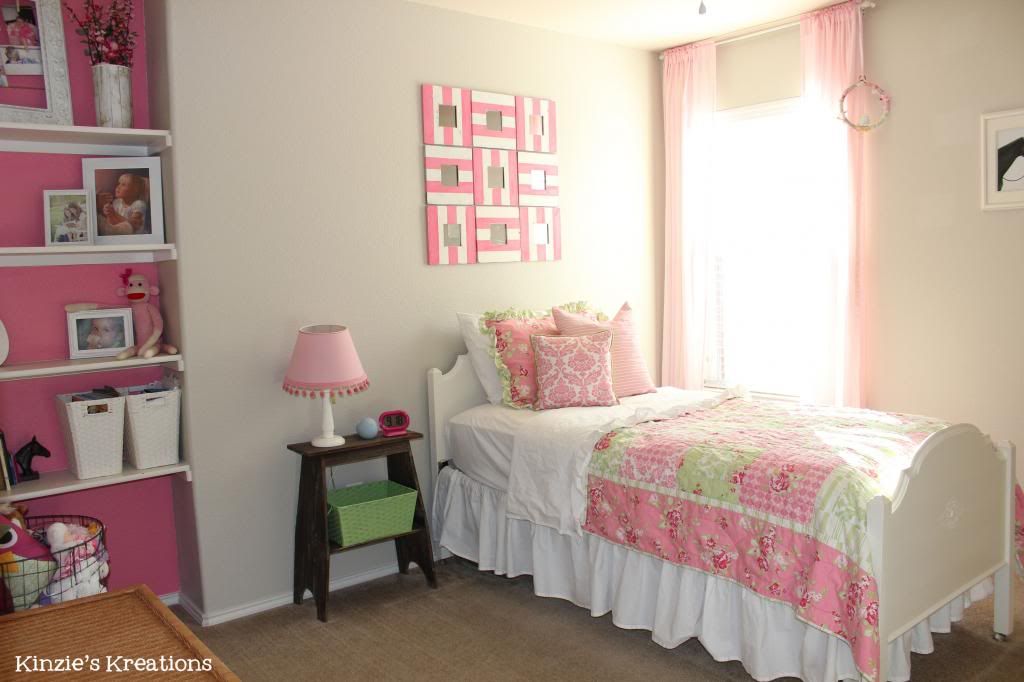
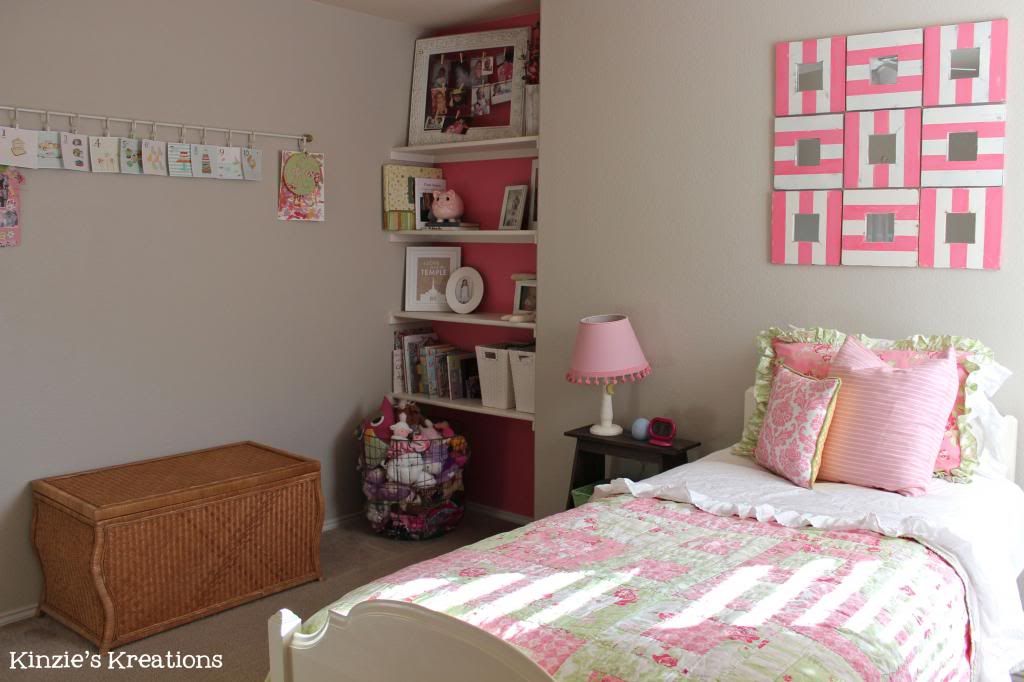
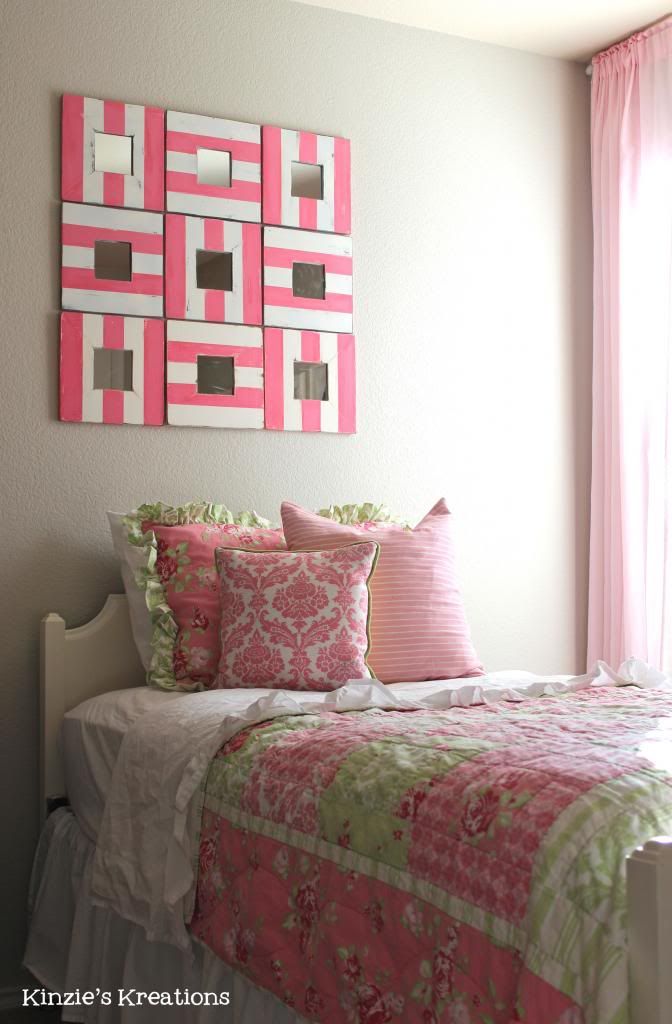
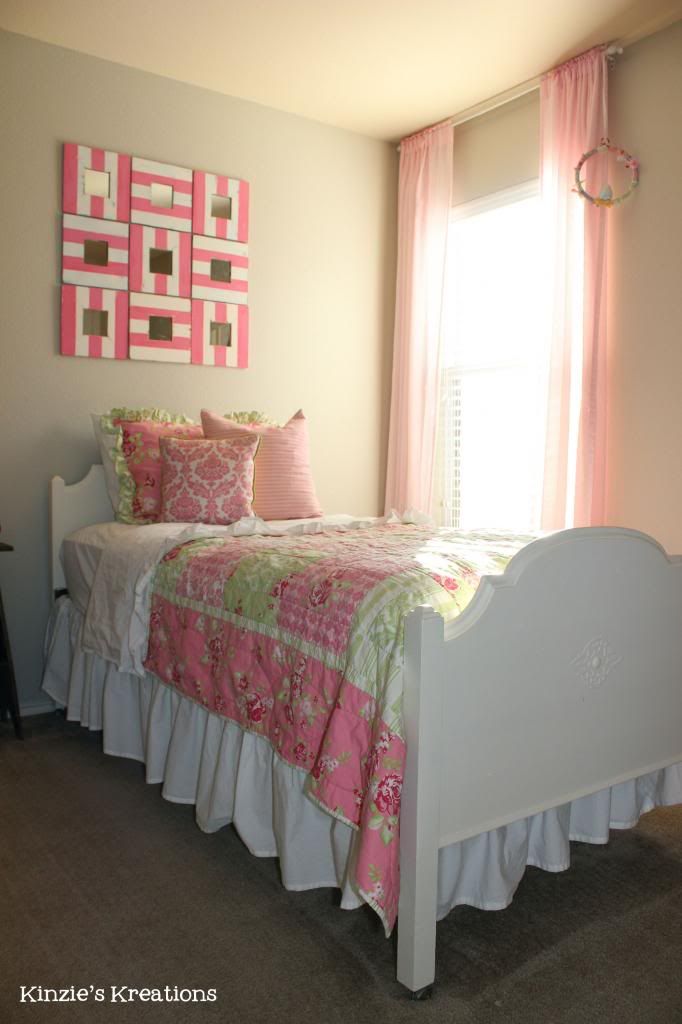
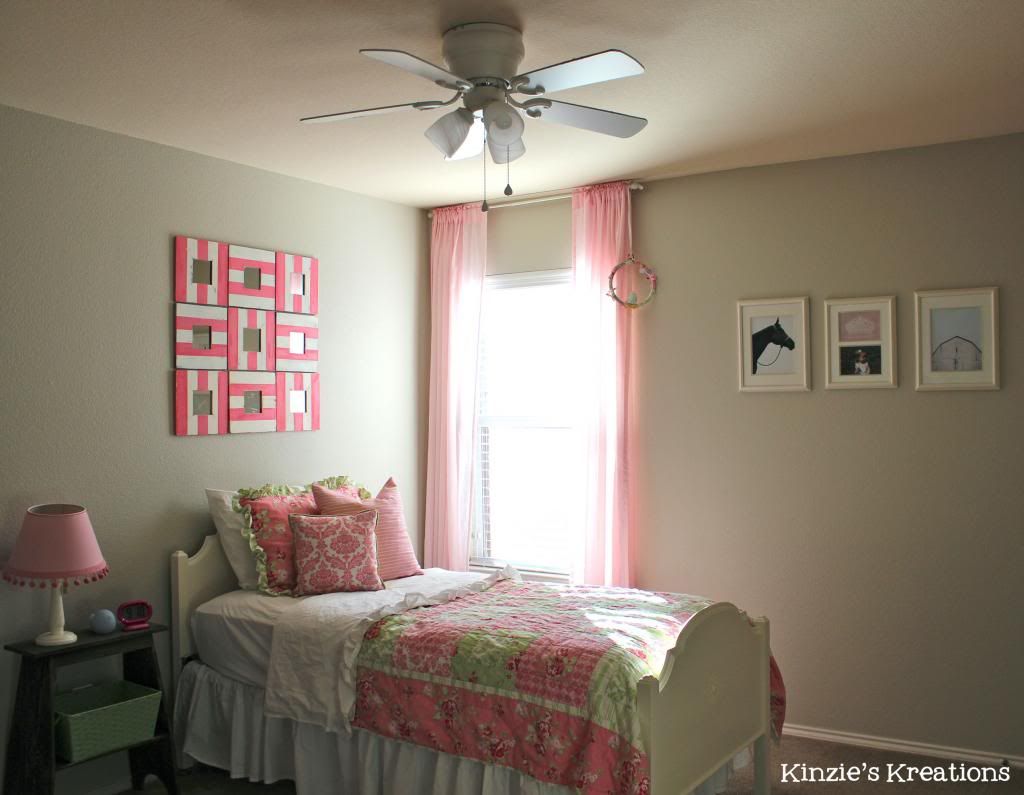
I posted the boys shared room a while back, and figured it was about time to post a few pictures of my daughter's room. I didn't really have a theme in mind- so it's a combination of girly pinks and greens, horse lover, shabby, and playful elements.


I made her bedding back when she was turning two and moving into a twin bed from the crib. See the original quilt post HERE. When we moved into this home, I could finally decorate a room, since before she was sharing it with baby brother.


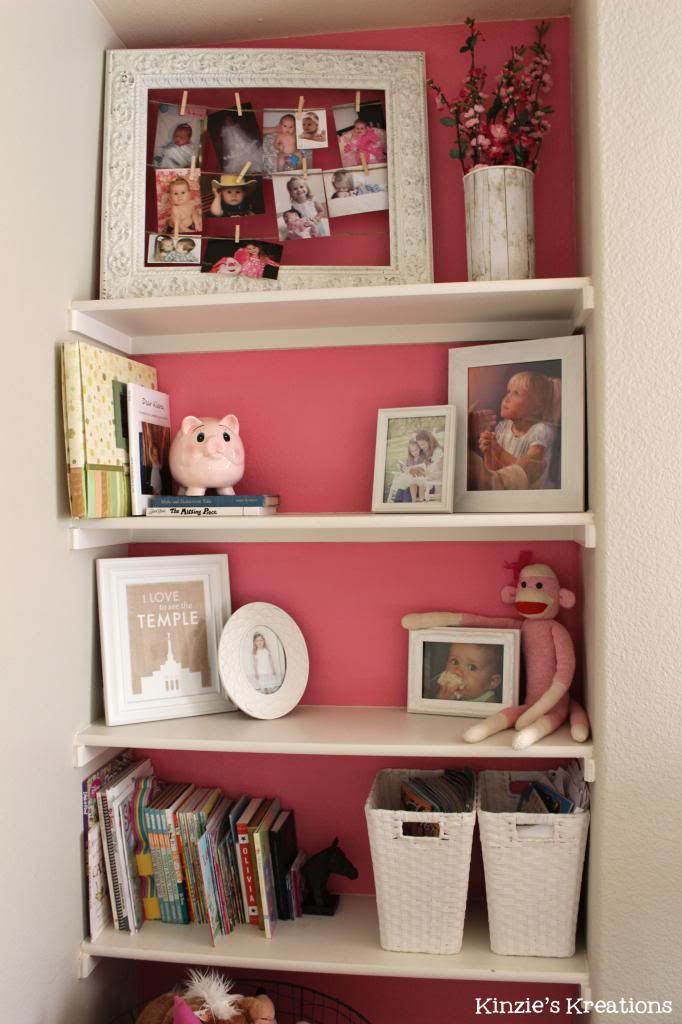
I painted the back walls of this built in shelf area pink (Martha Stewart Living, Hollyhock Pink MSL007) to set it apart (and to compromise with my daughter since she wanted the whole room painted pink!)

Her blessing dress was the same dress me and my two sisters wore. It is too beautiful with so much history and sentiment behind it. We love seeing it each day.


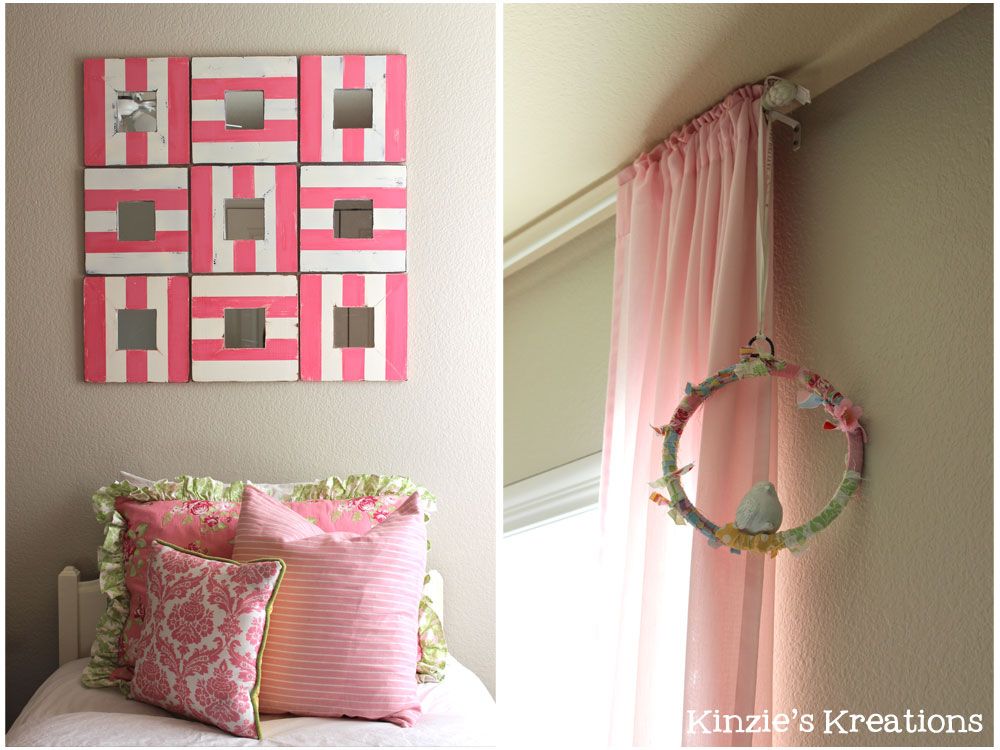
The mirrors are cheap Ikea mirrors that were originally raw pine or dark stained wood. I gathered 9 from my unused home decor box and decided to paint them with wide stripes. I used extra pink paint from the shelves wall- so they coordinate perfectly.

I made the little dream catcher back when she was a baby. You can see details from the original post on it HERE.

I got her bed frame at a yard sale. That thing seemed like 100 years old, the rails were attached with some heavy-duty iron mechanism. I stripped the paint (I think there were at least 6 different colors on it from over the years.) It took some time, but it made the new antique white paint much smoother.

Her room is definitely girly and pink, but it was a lot of fun to put together. I mostly wanted it to be a room that SHE loved, and she does so it makes it all worth it!


Some art prints info from her room:
I Love to See the Temple- Have Joy designs on Etsy
Country Barn photo- Spencer Johnson on Etsy

11.08.2012

Turkey Dice Game

My Gingerbread Dice Game printable has been one of my post successful printables to date with over 13,000 downloads! I've had a gazillion email request for more varieties of this game, so here we go. First up, since it is November, a Turkey Dice Game printable. Once again, I did not come up with the idea of this game, just the printable so we don't have to draw one out each time the kiddos want to play.


Click HERE to download the PDF of this printable. It prints on a standard 8.5" x 11" paper.


Here are the rules for how we are going to play:

Going around in a circle, each player rolls the dice when it's their turn. 
The player then gets to color in one of the segments with that number on it. Then, it's the next player's turn to roll and color.
The first player to color in their while turkey wins!

Have fun playing!


***Reminder, this printable is copyright of Kinzie's Kreations. This is for personal use only. Do not print to sell, or sell the PDF file. Thanks!***

9.07.2012

A Room for Two Brothers

Since both of my boys celebrated their birthdays last month, I decided it was time to share some pictures of their room. It's completed for now. Of course, I have more that I'd like to do with it, but I think it's at a good stopping point while I focus on other projects around the home.

Here is the picture I took of their room a month before the house was completed.

And here it is a month later, just days before we closed. It was a beige 12'x12' box. The perfect blank canvas.

At that point, big brother had the room entirely to himself, and this is what it looked like until we morphed it into his transitionary big boy room. We didn't know if the coming baby was a boy or girl, so I didn't want to do anything permanent.

After little brother's arrival, I started to mentally rearrange their room. I wanted it to be a playful, yet clean space for two brothers.

The twin bed that big brother sleeps on, has a match in the attic just waiting for little brother to be ready for it. I can't wait to have their matching beds lined up along the wall under their matching jute monograms.


The rocker has seen better days. It may soon become replaced with a little reading/ play corner. 


This just shows the room from different angles to give a feel for how things are laid out. I have had so much fun putting their room together. I didn't do any super difficult projects or techniques, but I love how simple and crisp things are. I will do a separate post showing all of the fun little details scattered about, and maybe a few how-to posts.

Sources:
World Map print- Ink of Me via Etsy
Pirate Kitty print- Sass & Peril
Green stripe paint color- Behr, Grass Cloth 400D-5

7.31.2012

Busy Binders

With an upcoming road trip soon approaching, I have been trying to come up with as many things as possible to keep my kiddos entertained, busy, and happy. That's when I decided to make some Busy Binders. I actually got the idea when I was shopping for my daughter's school supplies. I initially bought some plastic folders with brads, but quickly realized that they would not hold nearly enough stuff. So I traded those out for some 1 1/2 inch binders, and quickly started filling them up. Oh, and of course I had to make some cute covers...

I bought several of those zippered binder pouches to keep the smaller objects and activities.


I added some vintage storybook pictures to the back covers because my kids love to look at all the little details of the pictures. Just another way to pass the time.


Here are some things to include in a Busy Binder.

  • file folder games
  • stickers
  • picture search pages
  • colored pencils, crayons, or color wonder markers and sheets
  • printable coloring pages, mazes, and word searches - find several free ones at Mr. Printables
  • a map of the United States (or one of where you are visiting)- I found ours also on Mr. Printables
  • lacing cards- here's a tutorial to make your own on Little Birdie Secrets
  • preschool printables- some of my free printables, such as the Number Wheel game would be great.
  • magazines
  • small soft cover books- the ones you get in Chick-fil-a kids meals are perfect.
  • coloring books
  • blank paper
  • binder eye spy bags- make your own with Six Sisters' Stuff

These are perfect for traveling, but also great for church or whenever you need to keep those kiddos occupied and happy.

What else would YOU put in a Busy Binder?


6.25.2012

T-Shirt Painting for Kids

Each day of the week we have a theme. Monday is Make Something Monday. So far this summer, we've baked fun dinners and yummy treats and made puppets. So today's project was painting t-shirts.


I cut out a shape from contact paper, then stuck it on the shirt. Then, I let the kids go to town with paint and circle paint sponges. I made sure that they filled in around the shape so that it would show up. We waited for the paint to dry a bit (not completely . . . we were too eager.) Then, we peeled away the contact paper to reveal our shapes. Now we just have to wait for the to dry completely. Once they are dry I will heat set the paint by ironing over each section for 30 seconds using a press cloth to protect the iron from the paint (just in case.)

You can get shirts for under $3, and we already had the fabric paint. It was an inexpensive project, but one the kids loved. The kids are so proud of their work, and I love seeing the fun they have doing it.

3.20.2012

The Layered Skirt

The other day I was working on crossing off some to-do's on my endless list. Cleaning the craft room was the task at hand. I cleared off the sewing table and put away the remnants from my last project. Then I started straightening the cubbies of fabric. That's when my daughter joined me and started oohing and aawing at the pinks and purples and flowers and polka dots. Then I joined in. We picked out a few fabrics then I threw in a few trims. Soon I was measuring my girl and drawing up a pattern. That's when I remembered the adorable Layered Skirt that Dana over on the MADE blog whipped up for her daughter's birthday. It was the pattern I was thinking up, but she already did the measuring and math for me. So this is my funky version of Dana's Layered Skirt. I did everything the same as her pattern suggests, I just added trims to each of the three ruffled layers before sewing the layers together.

"Stop taking pictures and come twirl with me Mommy!"

This skirt is SO my girl. She is spunky, sassy, and girly. She loves to dress up, and since this skirt is fluffy like a tutu, she loves wearing it. (In fact, she wore it for two days in a row!) An added bonus is that it is great for twirling in. 

One last picture. This girl has attitude. This picture is half "I'm so cool!" and half "I'm so done taking pictures." Love her!

9.01.2011

Closet Dividers

The addition of our little man to the family, means that he and big brother will eventually be sharing a room. Me being the organized maniac that I am, knew that I needed to get their closet in order. I dream of built in beautiful closet shelves, bins, etc. but for the time being, at least getting the hanging clothes in order was good enough to satisfy my ocd. Browse the internet and you will find tons of options for closet dividers. You can buy pre-made and designed ones, you can craft ones out of wooden shapes or letters- tho options are boundless. 

Not wanting to put much into this project, I decided to just design and print up some simple ones for now. I measured my rod to make a center opening big enough, and I measured the space from the rod to the upper shelf to make the surrounding shape fit within that range. I could have got fancy with fun patterns on each divider, but I decided to keep it simple so that I could easily see the size text on each divider. After designing, I printed two of each size onto cardstock, used a circle cutter to cut out each one. Then I glued the two of each size together, laminated, and cut again. I was left with sturdy yet flexible dividers:

Here they are in use:

I am using up to the 3T dividers. But, as you can tell there are still boxes of clothes to put out, but we won't be using any of the 3-12 month clothing too soon. I keep all of their onesies and sleepers in their dresser to free up room to hang day clothes. It's nice to be able to see what we have in what sizes. In my dreams I'd love to have all store bought white hangers, but why pay when we get them for free. With the dividers I can ignore the sizes on the cheap-o hangers- so I can put a 2T top on a 3-6 month hanger and it doesn't get me confused.

The great part about my dividers is that I didn't have to spend a penny to be organized! Oh, how I love organization!

8.30.2011

Not Just About Baby

Just because a new baby was coming, didn't mean that the older two weren't included in the crafting madness. Both big sister and big brother got their very own shirts to proclaim their status of Big Sis & Big Bro.


To make these shirts, I used the same process as I described HERE in a mini tutorial post.


They wore these shirts to the hospital when they met little brother for the first time. Both are happily adjusting to their new roles. Big sis is a big momma's helper- holding baby more than anyone in the house, burping baby, finding burp cloths, throwing away dirty diapers, and most appreciated- entertaining brother. So my older two wear their shirts with pride, just as they hold and love their baby brother with pride. Love my kiddos!

6.02.2011

Spring Sewing

I haven't been much at posting lately. Too many projects, too many favorites, too many pictures, and too little time to post any of it. So here are 3 of my favorite clothing projects that I've made for my daughter so far this Spring/Summer. Many more are in the making along with stacks of fabric just waiting to be made into something fun!

This one below, I made around Easter time. It was perfect for Easter egg hunts, though if any of you know my daughter well enough, know that she would have prefered the pants be a skirt instead.

I've made several skirts in the past few months and she is sure to wear them out. My girl can twirl in a skirt for hours on end. Here is one I made just yesterday. I'm loving the bow I attached at the waistline, and so does my daughter. 

I always have a few unembellished shirts sitting in my craft closet just waiting for their chance to get stenciled, appliqued, or embellished in some manner. This one I made during naptime, and when my daughter woke up from her nap she ran in and put it on before I even told her about it. She has become accustomed to new creations waiting for her in the craft room when she wakes up from naps, and I love the challenge of creating something on a whim during that block of quiet time.

Now I'm off to imagine up my next project. I've recently been feeling the overwhelming desire to have a project going at all times because I know in a short couple of months my arms will be too full to craft everyday.

5.24.2011

Infant-Toddler Tie Patterns & Tutorial


This has been a long time coming, and I am now excited to share with you my Toddler Tie Patterns & Tutorial!! I recently used my patterns and instructions to teach some ladies in my area at a Super Saturday crafting event, and their ties turned out so cute. It's fun to see the ties in all of the different fabrics that people choose, and even more fun to see the ties in action on their cute little boys!


All files are available for download as PDFs. This pattern is available in 4 different sizes:


The instructions go step-by-step and include pictures with each step. Hopefully this will make the process clean and easy. Please let me know if you have any questions or suggestions for clarification.

As always, these patterns and instructions are copyright of Kinzie's Kreations. They are for PERSONAL use only. Do not reproduce this pattern or sell for profit. Do not sell products made using this pattern and tutorial. Thanks for your cooperation!

Enjoy!


Linked up to:


Thirty Hand Made Days

2.14.2011

LOVE Poster

Lately, I've been adding a little yellow into my daughter's room (and all over the house for that matter.) I think I've been yearning for Spring and sunshine. I have a few other yellow projects in her room that I'll show once I take the time to photograph them. So for Valentines Day, I made my daughter this piece of art to hang in her room.

Photobucket

This frame is pretty big- the opening measures 20" x 28" I designed one digitally, but didn't want to have it printed on photo paper, and I didn't want to wait (or pay) to have it printed somewhere else. So I put my mind to work. I bought a sheet of white poster board. Cut out the L,V, and E out of contact paper, and stuck them on the poster board. Then I whipped out some yellow spray paint I already had and sprayed the paper until it was as yellow as I wanted it. I let it dry then peeled off the letters. Then, I cut out a heart from pink cardstock, stuck it on, then put the art in the frame. It looks so cheery to match the beautiful sunshine we had today!

1.31.2011

Handsome in a Toddler Tie

About a year ago I made my bubs his first tie. He was so cute all dressed up with an itty bitty tie. Those first few ties usually ended up as something to suck on, and would become soaking wet by the end of the day. Now that he's a bit older, and past the I-stick-everything-in-my-mouth stage, I decided to make him some more. This time quite bigger. This tie turned out so cute, and he looked mighty handsome!
Photobucket

I know I said I was creating a tutorial in that post a year ago... we'll see if I can make one this time around.

12.15.2010

Snowflake Shirt Stencil

When I'm at a store and find plain t-shirts, (a pet peeve of mine is that you can hardly find a child's shirt without some crazy graphic on it, or even a simple graphic on it... I'm talking plain, solid, no embellishment shirts) I buy a couple because I never know when I might want to bust out a little craft project, and embellish it myself.

About a month ago, I had one of these urges. So I pulled out one of the plain, white, long-sleeved shirts I bought at Walmart (for $3.50!) Here's what I did.

1. Printed out a snowflake design onto the paper side of freezer paper. Just cut your freezer paper down to a standard paper size and run it through your printer as you would plain paper.
2. Using an exacto knife, I cut out the snowflake, being sure to keep the little circles and pieces.
3. Then, I iron my freezer paper onto my shirt with the waxy side down. Iron long enough that the wax melts and makes the paper stick to your fabric.
4. Paint your stencil. I just used regular craft paint. I love using the fabric paint because it washes up nice and soft, but if you don't have any on hand you can always use regular craft paint. It isn't as soft, and it may crack, but I don't mind the look it creates.

I did a layer of creamy beige, and then a layer of pearl finish to give it sparkle.
And a close up of it painted. 
5. Wait for it to dry. I always get excited to see the results and peel it off before it's entirely dry, and it doesn't seem to hurt- just peel off slowly.
6. Once completely dry, no rushing it on this step, heat set your paint by pressing with a warm iron for 30 seconds over each portion. If you are afraid of paint transfer, use a pressing cloth in between painted design and iron.

The results: 

We love this shirt because it's cute, yet neutral enough to wear with a lot of different things. Plus it works great as a layering shirt too. This is our little way of bringing a little snow to Texas!

Amazon Affiliate