Showing posts with label Party. Show all posts

6.01.2014

A Foxy First Birthday Party!

Our little boy is turning ONE, so we took the chance to celebrate his first year together with family and friends. A one-year-old doesn't need anything grand in a party, so I fully admit that the planning and details of the party were for my own pleasure. I had too much fun dreaming, planning, shopping, and crafting for this party. His room is woodland inspired, so I stuck with that and went to town.

I designed this little birthday fox and used him throughout the party.
I made masks for all of the kids. They got to pick from a fox, deer, owl, raccoon, and skunk.
The florist from my wedding took me to a floral market where I got to dream up and pick from rooms and rooms of beautiful flowers! I was in flower heaven! I built and stained some wooden planter boxes and my mom played florist on party day and executed my vision perfectly!! I couldn't have done it without her! I designed the wood "1" toppers and my dad cut them on his laser wood cutter at work.
We played a slideshow of pictures from his first year of life. So fun to reminisce on all of his sweet moments.
My sister had the great idea to cater her son's party, so I saved myself the extra stress and had the delicious Costa Vida cater. That meant all I had to do was the fun stuff- making the rest of it look cute!
We had a coloring table and chalkboard outside for the kids to use.
We had a woodland trees ring toss game for the bigs (I also designed these and had my dad cut them on his laser wood cutter,) and a ball pit that was a hit with the babies.
Then for the big moment- his first cake!
We had a chocolate tree stump cake for the adults too, and orange flavored cupcakes for the littles. 
He ate here and there at his cake, and when he was done, he let us all know by dumping it on the floor!
 Then, he was off to a bath, and we said goodbye to our friends.
 Happy (almost) Birthday to our baby!

9.06.2012

Cars 2 Cake

My little boy is obsessed with anything Cars 2 related. He likes Lightening McQueen okay, but he loves Finn McMissile. As his birthday approached, he constantly reminded me that he wanted a Cars 2 birthday party. 

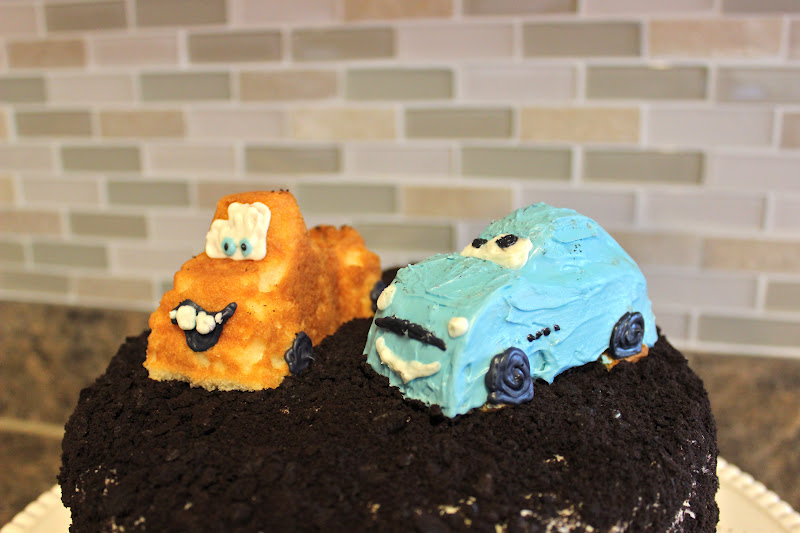
Here's the cake I made for him:

I used a car forms cake pan, and chose the ones that were shaped most like Mater and Finn. I frosted Finn with blue buttercream, and left Mater as just cake, because it looked more rusty than frosting would have. I added the eyes, mouths, and wheels with more colored frosting.


The cake was just a plain vanilla cake, but I added chopped Oreos into the batter before baking. It has three layers, is frosted in cream cheese frosting and has crushed Oreos all over it- kind of looks like dirt . . .


The birthday boy loved it, and devoured Finn while sharing Mater with his big sister.


1.31.2012

Cowgirl Party

Anyone who knows my daughter, knows she is a cowgirl at heart. It all started with an outing to the rodeo, and since then she has been hooked. She loves horses, boots and cowgirl hats. Every time she sees a horse or a barn, she shouts out its name with excitement. So last year, as her birthday approached (okay so several months before her birthday) she told me she wanted a cowgirl birthday party. I had been throwing around party themes, but that idea topped them all, and I was so excited to get planning. With a baby due just weeks after her birthday, I wanted everything ready way in advance. We planned, made lists, bought supplies, and crafted.

I had so much fun designing the invitations. When they were finished and printed, we drove to each of her friends' homes to delivered them.

When the day arrived I put up a few simple decorations and we had lots of fun activities to do. 
As the kids arrived they got to dig through a basket filled with cowgirl/boy hats, handkerchiefs, vests, etc. and dress up as a cowboy or cowgirl.

We did a bean bag toss:
I saved a big piece of cardboard from some package we received way back when (finally justifying my oh-I'll-keep-that-because-it-may-come-in-handy-one-day hoarding mentality.) Then I sketched out some farm animals, then painted them in. Once the paint was dry, I cut out some holes and was ready to go. I made some bean bags out of scrap fabrics. Then, I just had some helpers hold up the board as the kids tossed the bean bags.

We did stick horse races:
I was originally going to make some simple stick horses then give them away as favors, but time got the best of me. Instead I borrowed some from my mother-in-law's prop filled Drama classroom.

We played pin the tail on the horse:
I used a piece of brown poster board to paint a horse on. Then I cut out tails from black poster board. Each tail was labeled with a child's name. The rest is self explanatory.

We played Pop the Pig: 
This was the kids favorite activity (except a few of the younger kids.) I blew up a ton of balloons and drew farm animal faces on them (mostly pigs.) Then on the count of 3 the kids were to see how fast we could all pop the balloons. It was loud, crazy, madness, but the kids LOVED it.

After games and presents, we sang and ate cake:
This was my first time using fondant on a cake. It made the decorating process much easier. I made one traditional cake and then lots of cupcakes.

As the parents arrived, K handed out the goodie bags:
We filled each handkerchief with some horse stickers, sheriff badge, horse tracer & pencil, and some candy, then tied it all up with some string and a "Thanks Y'all" tag I designed.

My cowgirl and her band of buckaroos had so much fun, and I had fun putting it all together to make it a special day for my sweet little girl.

9.03.2010

SUPER-KID!

My cousin's son was having a party. We've been recently initiated into the world of boy-ness. So recently, that I haven't had much practice in creating gifts for little boys. I hardly ever just go to the store to get a gift, and since it was my cousin, there was no doing it the lazy way. So I went to my fabric shelf and had a looksee.

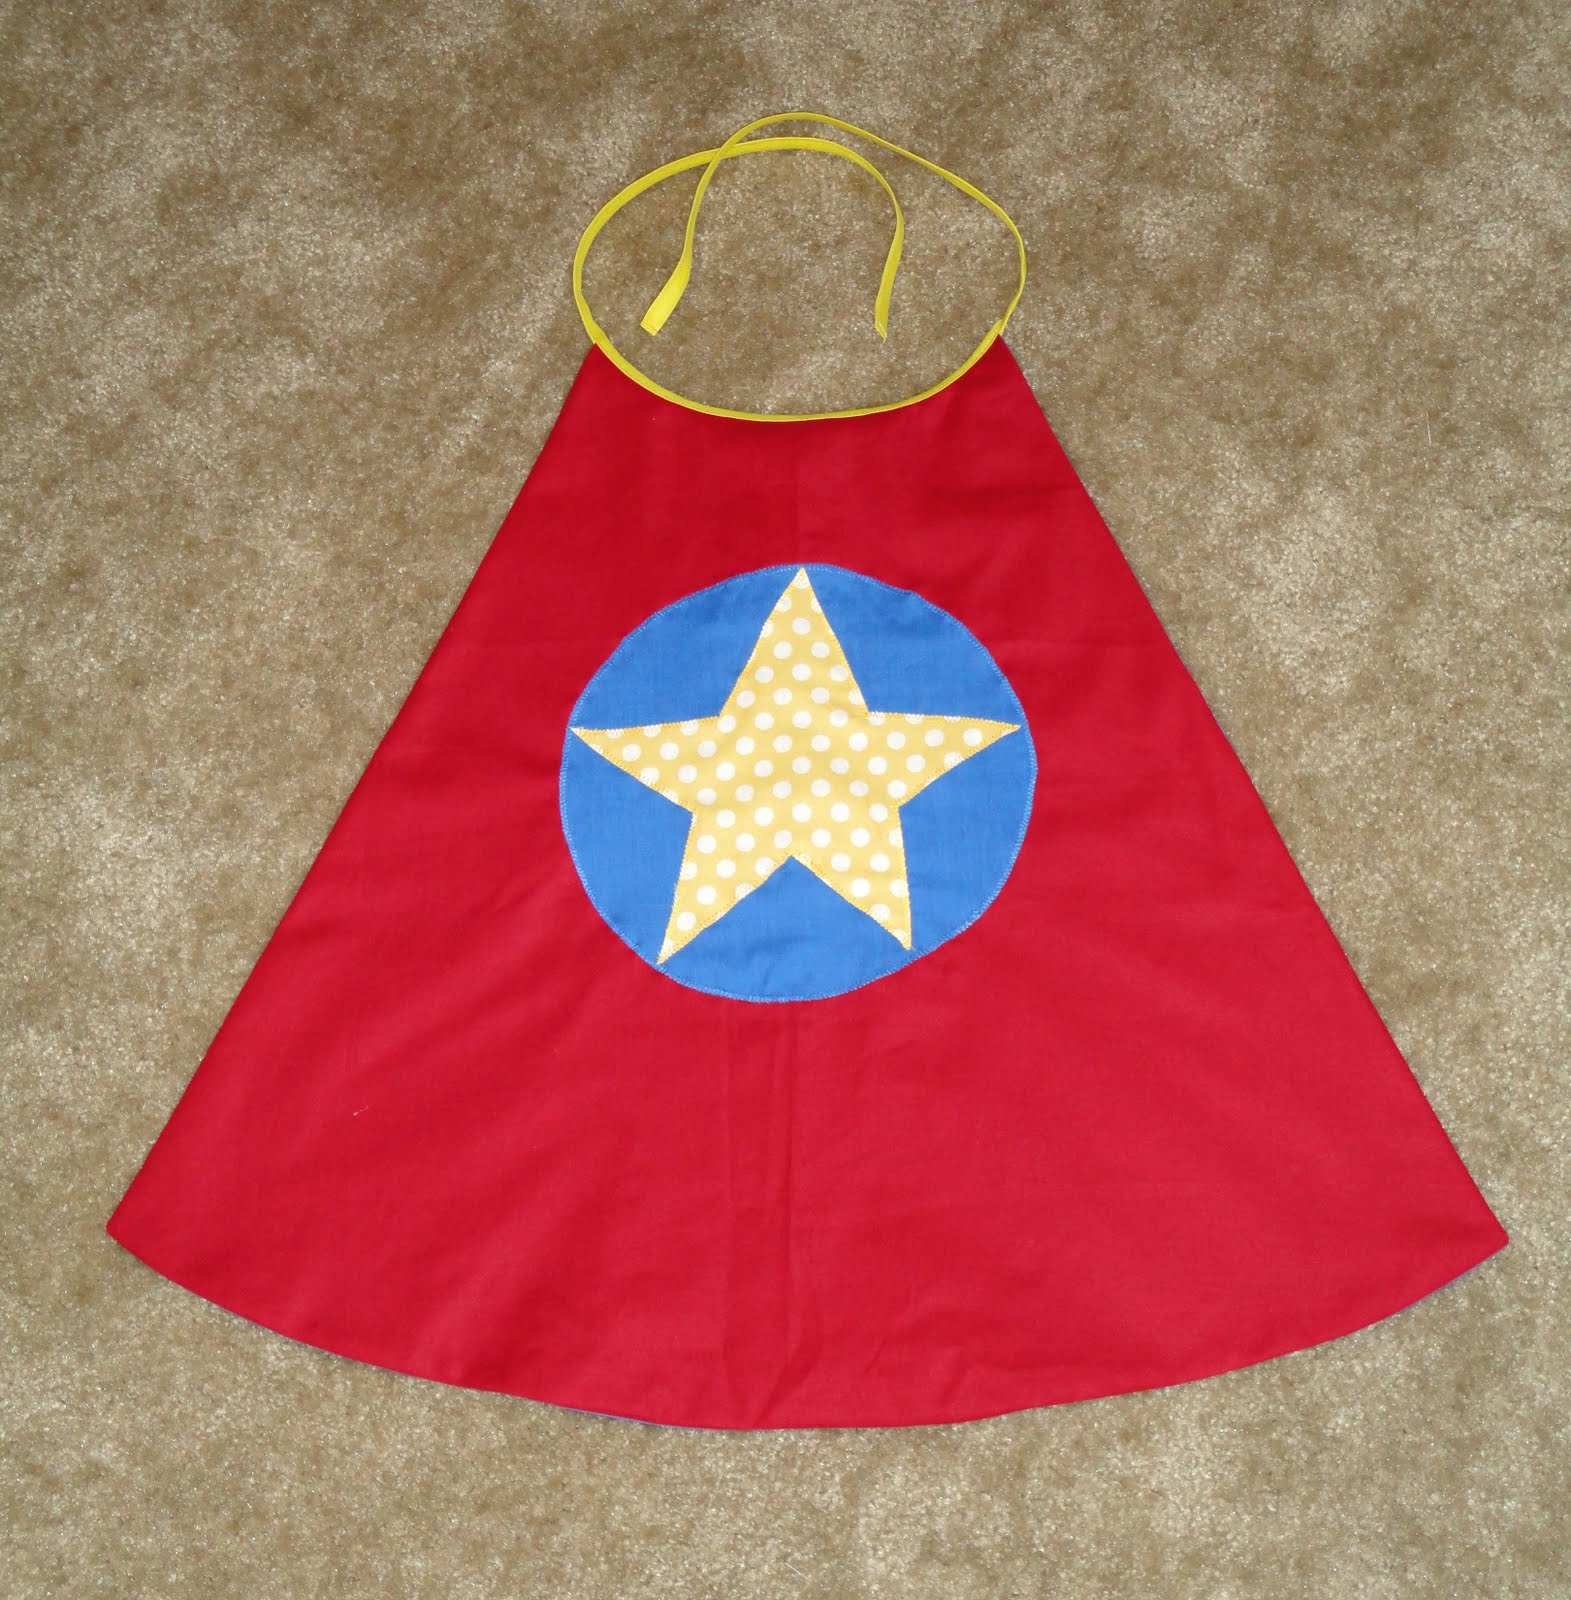
One of my daughter's favorite things to do while we're playing is to fly with her stomach on my legs, "Look Mommy, I'm not holding on!"  Little broter is starting to find the joy in this too. Seeing my cuties soaring in the air was inspiration, and I knew what my fabric would be used for- a SUPER-KID cape!
When he pulled it out at the party, at first he wasn't quite sure what it was (he's three, can you blame him?) But once us big kids told him what it was, he wanted to put it on and have his mom fly him around. Then the other kids wanted their turns wearing it and flying. I think that's a good way to get a good arm workout. So there's my SUPER-KID cape, that also gives you a SUPER workout!

7.28.2010

Ladybug Party: Printables


I love a reason to create something digitally. I do plenty of sewing, but making something playful and unique without using up tangible resources is always fun. So for my daughter's birthday I had the perfect excuse to create an invite and some other printables. You are the lucky beneficiaries of my after-the-kids-go-to-bed digital creations!

I created a page of punchables that you can use as cupcake toppers, favor tags, or whatever else you can think of.

After designing my daughter's invitation, I just altered it slightly to make it usable by all of you.
 
They are sized to be printed as a 5x7 image size. I made a generic one for any age, as well as customized invites for ages 1 year through 5 years. You can just add the party specifics, and even a photo of your cutie, in the empty fields.

**As a reminder, these printables are copyright and property of Kinzie's Kreations. These are for private, personal use only. Do not use for commercial use. Do not sell these files or printed creations.**

If you do end up using any of these, I would love to see how you use them. Feel free to email me pictures to be featured on this blog! ENJOY!

7.27.2010

Ladybug Party: Cake

I've never been an adventurous cake maker. I've made a few cupcakes in my day, but never a full on cake. To be honest, I've never really liked cake. In fact, every year for my birthday I always have cheesecake in lieu of the traditional birthday cake. One of my daughter's biggest requests for her birthday was a strawberry cake, so I decided to get a little creative with her cake. My sister helped me bake up a bunch of cakes in different sizes, plus a bunch of mini cupcakes to use up the left over batter. After baking, mixing up some fluffy frosting, and decorating, I created my first birthday cake and was so excited for my daughter to see it.
She loved it! I asked her what part she wanted to eat and she was happy to claim the head!
We can't forget about the mini cupcakes. They were the perfect size to pop in your mouth (maybe too perfectly sized because I may have eaten one-too-many!)

How I made the ladybug dome cake:
Generously grease and flour a pyrex glass bowl. Fill with about 3 inches of cake batter (we made strawberry cake for ours.) Bake until done- sorry I can't remember how long it took. Just bake it similar to how long you would bake an 8-9 inch cake round adding as much time as you need so that the center is cooked. If you need, put tin foil over the top to prevent burning.

You will also need one larger cake for the base. We used about a 12 inch round, but you could use a rectangle as well. For the head we used a cupcake and shaved off the bottom edge at an angle and around the edges to make it nice and round.

How to assemble and decorate:
1. Place base cake on cake stand or serving platter and frost with green frosting. Don't worry about getting it smooth because you then texturize by patting the entire cake with your spatula.
2. Frost large domed cake for ladybugs back. I did the red first and then filled in the small area with black. Then add your black spots on the red.
3. Carve your cupcake and place it on the base cake and leaning of the ladybug's back. Frost with black frosting. Use white frosting for eyes, add a round sprinkle on each eye. We used pull-and-peel red licorice for the mouth. We wanted to use black shoestring licorice for the antenna but couldn't find any and ended up using a black pipe cleaner instead. If you have time to let some of the red pull-and-peel dry out a bit, you could use those for the antenna.

7.26.2010

Ladybug Party: Tutu

My daughter's third birthday party theme was ladybugs. Lately, she's been a bug lover, so lady bugs seemed befitting for our little lady. And what does every little lady need on their birthday? A tutu of course! I made this simple tutu spending very little money (mine cost around $6) and very little time- perfect when you have lots to do!

Front:

Back:

Just in case you wanted instructions here they are. Sorry that I didn't take pictures because I wasn't thinking about giving instructions.

Materials:
4 yards of red tulle
2 yards of black tulle
1/2 inch elastic
red thread
ribbon

Instructions:

1. align the selvedge edges and cut your 4 yards of red tulle in half to make 2 two-yard pieces. Stack the two sections on top of each other and then on top of the black tulle. All layers should still be folded and 2 yards wide. Pin the layers together around the edges to keep them aligned and neat.

2. Cut along all of the folds so that each layers is now it's own piece and not connected with a fold. With black tulle layers on top of stack (or in whichever stacking order you want), fold in half lengthwise (black tulle will be sandwiched in between several layers of red.) Pin along the fold to hold all of the layers together.

3. Set your sewing machine to a short stitch length. Sew close to the folded edge (about 1/8th to 1/4th of an inch away from edge.) Now sew another line 5/8 of an inch away from that first seam. Be sure to backstitch.

4. Now that it's sewn you can remove all pins. Lay out and trim to make all the layers even on bottom edge and two side edges. (Or you can just leave it for a more wild look.)

5. Feed elastic through the casing you created. Adjust elastic to fit the child around their waste. Secure elastic by sewing across both ends.

6. Cut 2 pieces of ribbon 20 inches long each piece. Heat seal the ribbon edges to prevent fraying. Sew the end of each ribbon piece to the casing edges over where you sewed the elastic in. DONE!
Now tie it on your child and twirl the day away!

5.03.2010

R.S. Birthday Celebration

At the beginning of April our Relief Society held it's annual birthday activity. The theme was
Bloom Where You're Planted

We had Tissue Paper Flowers hanging above the tables in various colors.

The centerpieces consisted of a pot filled with cake pops, a few pots of live flowers, ceramic birds, and gardening gloves.

The front table had a gardening theme spread as well: live flowers, gardening tools, ceramic birds, and a spring colored pennant that I showed here before.

I created a simple leaf quote to attach to the flower cake pops, available for download here.

The evening was beautiful. We ate a delicious light dinner with cheesecake for dessert. A lady from the Coppell Community Gardens taught us about container gardening, and our Stake Relief Society President gave a wonderful message on Blooming Where We're Planted and accepting every situation that is placed in front of us, however difficult it may be. It was a great chance to get together as women and enjoy a fun evening.

7.21.2008

Big Birthday Bash

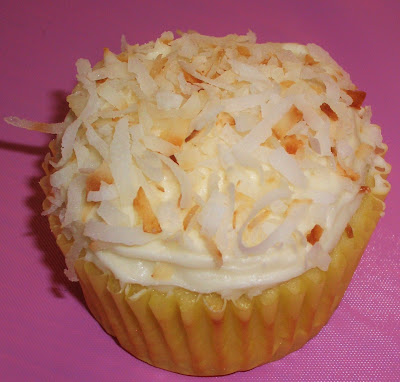
Can you believe that K is already ONE?! For her big birthday bash, I made her this funky ensemble. Can I just say that I LOVE this fabric!! The top has adjustable button shoulder straps and a tie at the waist. The bottoms are mixed-matched, only adding to the funkiness :) She sure was the princess for a day.For dessert, we had cupcakes: chocolate cupcakes with chocolate frosting, and keylime cupcakes with cream cheese frosting and toasted coconut on top- both were delish!
Amazon Affiliate