Showing posts with label Tutorials. Show all posts

4.03.2013

Easy Minky Baby Blanket

I posted about a minky baby blanket that I made for a friend's baby, and here is the quick tutorial to go with it. These blankets are fairly easy to make, and can be completed in less than an hour. They are super cuddly and so cute.

Materials needed:
1 yard minky
1 yard cotton, satin, or flannel fabric
1-2 packages satin binding (at least 4 yards length total)
coordinating thread

Instructions:
1. Lay out your front side fabric and make sure that the edges are straight and square. Round out the corners by tracing around the edge of a plate or can with a pencil and trimming off excess (I didn't do this then, but did it later. Either way works.

2. Baste satin binding trim around the front side fabric using a 3/8" seam allowance, onto the right side of the fabric. Overlap edges of binding where they join.

3. Lay out your minky, right side up, smoothing out any wrinkles. Place front side fabric on top of minky, right side down. Trim off excess minky (or trim after sewing like I did, because I was too lazy...) and pin through all layers.

4. Using a 1/2" seam allowance, sew through all layers, making sure to leave an opening.

Here's the seam opening:

I left about 4 inches open.

5. If you haven't already done so, trim off excess minky now, clip corners but don't snip through the seam.

6. Now flip the blanket right side out through your opening.


7. Now you can hand sew up the opening (which is what I did) or top stitch around the entire blanket, catching the opening in your top stitch seam.

Done!


10.02.2012

New Lamp Revamp

After building my new entry table, I was on the hunt for a lamp. I had a vision in mind, but the lamps I kept falling in love with were way out of my price range. Like these:
Restoration Hardware: on sale for $145 not including the shade.


I knew just what to do. I headed over to HomeGoods where I knew they would have something that I could work with at a much better price. I found this lamp for $49. Yes, that price was a bit high still, but compared to the designer options, and the fact that I save money by building the entry table myself, I decided to splurge.
The shade was not what I wanted at all. I had another spare shade up in the attic- I think I paid $10 for it originally. I pulled it down and stuck it on. The shape was good, but the color wasn't working.

I had some extra burlap, and got to work recovering my lamp shade.


Using spray adhesive, I stuck the burlap to the shade and cut as I went. I left about an inch extra on the top and bottom that I would use to fold over afterwards. I also left about 2 inches extra to overlap the seams on the back of the shade. Using hot glue I folded over the seam edges and glued it down.
 

Then I used hot glue to fold over the top and bottom edges into the inside of the shade.

 I cut slits to fit around the shade supports.

I could have been a little more perfect, or added some ribbon to finish it off cleaner, but I'm lazy and figured it didn't really matter. In the end, it turned out exactly as I envisioned. In my opinion, it looks just as good as the expensive designer ones.

Let's do one last comparison:


9.19.2012

A Ghosty Pillow

We love Halloween, mostly because it ushers in all of the holidays. I don't love the spooky aspect of Halloween, but the kids enjoy a little ghost, bat, or spider here and there. I went into my fabric stash, grabbed a pillow form I had in the closet, and made this friendly little ghost pillow.

 I kept the colors neutral, making it match the rest of my home decor a bit better.

Subtly spooky!

Sorry there isn't an in-depth tutorial, but I didn't take pictures as I went. But here's what I did: I cut out a simple ghost silhouette, used heat n' bond to adhere it to the fabric for the front side of the pillow, zig-zag stitched around the ghost, and made an envelope closure pillow cover. Here's a great tutorial from Freshly Picked for how to make an envelope pillow cover.

9.18.2012

Simple Pumpkin Canvas

Today the weather has been amazing. It's cool, there's a light breeze, and this just feel more like fall. I told myself I wasn't going to decorate for fall until October arrived, but with the weather today, I couldn't hold out any longer. I went up in the attic and pulled down what little we have for Fall, Halloween, and Thanksgiving. It was minimal at most. So I rummaged through my wood scrap pile and pulled out some leftover orange burlap to whip up this quick little project. (Sorry no pictures of the process.)


      What you'll need:
  • Piece of wood, any size you want.
  • Burlap to wrap around wood.
  • Staple gun & staples.
  • Contact paper.
  • Pumpkin outline printable (see below).
  • Scissors or exacto knife.
  • White craft paint.
  • Paint brush- I actually used a circular sponge stamper brush...


      How to:
  1. Iron any big creases out of burlap.
  2. Lay burlap on floor, and place wood on top of it.
  3. Wrap burlap to the back of your wood and staple in place. I staple parallel sides one after the other, and then switch to the other parallel sides, pulling taut as you go, but not too hard since burlap is a loose weave.
  4. Print out pumpkin to fit on your canvas with border room.
  5. Cut a piece of contact paper to fit the size of your board, trace pumpkin onto contact paper, cut out pumpkin, and set aside. Using the left behind contact paper, peel off backing and adhere to your burlap wrapped board. Make sure to press down well especially around the inner edges.
  6. Paint the negative space with white paint. With my circular sponge brush I dabbed paint, do not brush from side to side or the paint may seep under the edges of your contact paper.
  7. Once painted you can carefully remove contact paper.
  8. Set project aside to dry.

Enjoy!


Click on pumpkin above or HERE to download your pumpkin outline.

9.05.2012

Giant Chalkboard

Back to school was approaching and I found myself surrounded by school supplies and dreaming of chalkboards and freshly sharpened crayons. So on a whim, I decided to make a giant chalkboard before my oldest started kindergarten. My husband was out of town, so I loaded up the three kiddos, took out one of the seats to add some space for supplies, and headed to my favorite store- HD! 

I looked around at all the wood options, and found the perfect piece. I used a 5mm thick piece of underlayment measuring 4 feet by 8 feet. Underlayment is a plywood that is much smoother than regular plywood, plus it's thin and lightweight- perfect for hanging. I had a friendly worker cut it down to 3 feet by 6 feet. 

Then I picked out three 8 foot lengths of moulding to make a frame out of. This was the most expensive part of the project. I got some that was 89 cents a foot, but you can buy cheaper or more expensive depending on how much you want to spend and what you want the frame to look like.

Grab some chalkboard paint, 1- 30 ounce can is plenty, and a small high density smooth foam roller.

Supply List & Cost:
1 sheet of underlayment wood cut to 3'x6' - $10.85
24' of moulding - $21.36
Chalkboard paint - $9.67
Paint roller - $4.97

TOTAL- $50.72
(I had a giftcard, so my total was only $38)

Now load it all up, making an obstacle course of the van for the children.

After the kids went to bed, I spread out some plastic in the craft room and got painting. Following the instructions, I painted 3 coats of chalkboard paint on my underlayment. You have to wait 3 days before "seasoning" the board and using.

Then, I cut my moulding to make a mitered frame around my board. I just used liquid nails and clamps to attach the framing. When the frame is attached securely, do a finishing coat of paint and let dry.

My frame was done in time to use as a backdrop for my daughter's first day of school. (Well, I actually used the frame before I did the finishing coat of paint on the frame . . .) I had her write her name, and plan on taking subsequent pictures each year to compare.

Just last night, we hung the frame up on the wall so that we can doodle away. I simply countersunk some screws right through the frame into the studs in the wall. Putty up the holes and do some touch-up paint.

We keep some chalk in a jar, and made sure to mount it not above carpet, so the chalk dust can be easily wiped up. I have as much doodling on it as the kids do!


7.08.2012

Herringbone Nails

A few weeks ago I posted this picture on Instagram:

After posting I had questions: Did you do that yourself? Is that done by hand? Will you show me how you did it? So here's a little tutorial.


You will need:

Basecoat (I used Sally Hansen Xtreme wear in Sun Kissed)
Sally Hansen nail art pen in white
Clear topcoat (I used OPI topcoat)

1. Paint 2 coats of your top coat color. Allow to dry completely hard.
2. Shake nail pen and follow instructions to get paint flowing. Start by painting up and down lines on each nail. I do two on the big toe, and one on the little ones.
3. Paint angled lines in between straight lines, alternating direction.
4. Paint clear top coat and admire!


6.28.2012

Pallet Wood American Flag

Back in April I had this vision of a pallet wood American flag. Well actually, at first it was going to be a store bought wood flag, but I really wanted the distressed look to it. Then I realized, rather than me roughing up some smooth fresh boards, why not use boards that are already rough. So, the kids and I went pallet hunting. 

That thing was clean compared to the other options, but it still was quite dirty. I hammered and tugged and jumped on it until I got all of the boards separated. I ended up with 9 usable boards. Then I had to remove all of the gross nails. Then I sanded off the dark and dirty spots so that the paint would adhere good. I cut two of the boards down to 24" to put on the back to nail the front boards to- I just used the preexisting nail holes on the outer edges when I nailed it all together. The flag measures 25" x 40". 

I did all my work on the garage floor. I dream of a day when I can have a work bench with all of my tools in their own glorious places, but for now the floor works just great!

Then I gave it a rough while painting. I didn't worry about it being thick on the upper left corner because that would get painted blue.


Then, I taped off my stripes, and painted in between them red. After the red was dry, I taped off for my blue section, painted it and let it dry. After it was all dry and tape was removed, I sanded it all down to expose some wood and some of the white paint underneath. It looks nice and rustic and very patriotic.


I've considered putting a star in the upper corner, but until I figure out  the right one, I think it looks great just simple and plain.

11.29.2011

Christmas Wreath

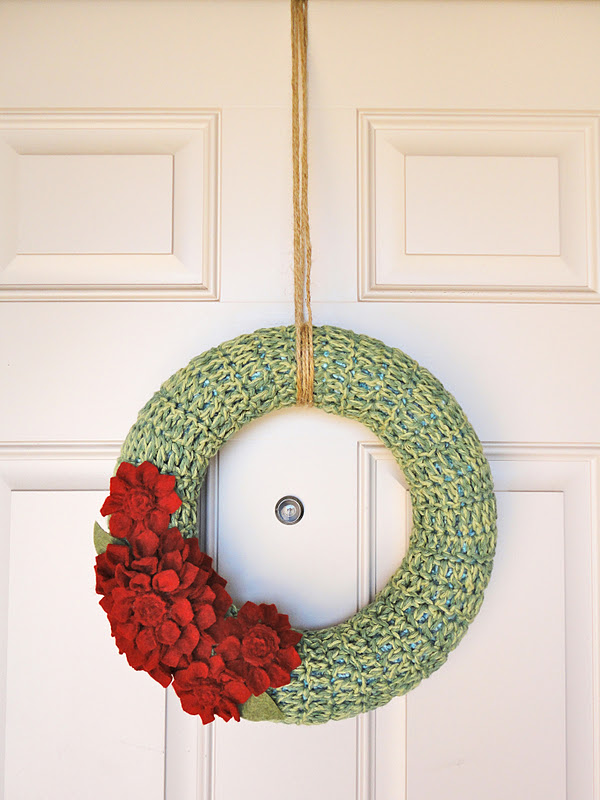
This year I was struggling to come up with a Christmas wreath idea. It seems as though every idea has already been taken. I was drawing a blank. Then, it came to me while crocheting some other project. (There are always about 3 crochet projects going on at the same time. They always get partially done, I get bored of it and move onto another crochet project . . .) So as I was making a scarf, hot pad, or beanie of sorts, I decided that this year, my wreath would be crocheted. You are probably envisioning something very grandmotherly, though there is nothing wrong with being grandmotherly- my mom is a grandmother and quite stylish, young, and modern. This is what I ended up with:


I used two skeins of yarn, in two different shades of green, and crocheted them together- I love the heathered look it gave. I used my wreath from last year- it was wrapped in aqua nubby yarn. I was lazy and left the yarn on the wreath- that's why you see bits of aqua peeking through. I'm loving the texture of this wreath! 

*************************

Here is a brief non-technical pattern. I used a 12" foam wreath. You will have to adjust to the size of your wreath. 

Chain 17, Turn, Skip first 2 chains, DC across, * Chain 2, Turn, DC across.* Repeat from * to * for 45 rows or until your rectangle is large enough to wrap the circumference of your wreath. Finish off, don't cut yarn.

Join short ends of your rectangle to form a big loop. I just threaded them on an embroidery needle and slip stitched through DCs and beginning chained row. Wrap rectangle around your wreath and now sew the long lengths of your rectangle together to connect around wreath. Knot and tie off, weaving in any yarn tails.

I then attached some felt flowers I made using this pattern: Not Martha's Felt Dahlia Flower


Now my door can MERRILY greet any Christmas time visitors!

10.03.2011

Halloween Rag Wreath

I've been wanting to make this wreath for weeks, but it's not everyday that I venture out with three kids to go fabric & craft supplies shopping . . . at least not lately. But today I finally got everyone ready early so that we could have time to browse. My daughter likes browsing the fabrics, searching through the pattern catalogs, and touching the yarn as much as I do. My son on the other hand, only cares about the snuggly fabrics and could care less about buttons unless they are in the shape of animals or cars. So I browsed quickly as to keep everyone, even baby in the moby wrap, happy. With supplies in cart, and "Grow a Skeleton" in the hands of my children, we checked out and headed home. After a quick lunch, the time had finally come for me to get my craft on.

Here's what I made:

And here's how to do it:

Supplies: 1.5 yards burlap
wreath form- I used straw because it was cheapest
scissors or rotary cutter & mat

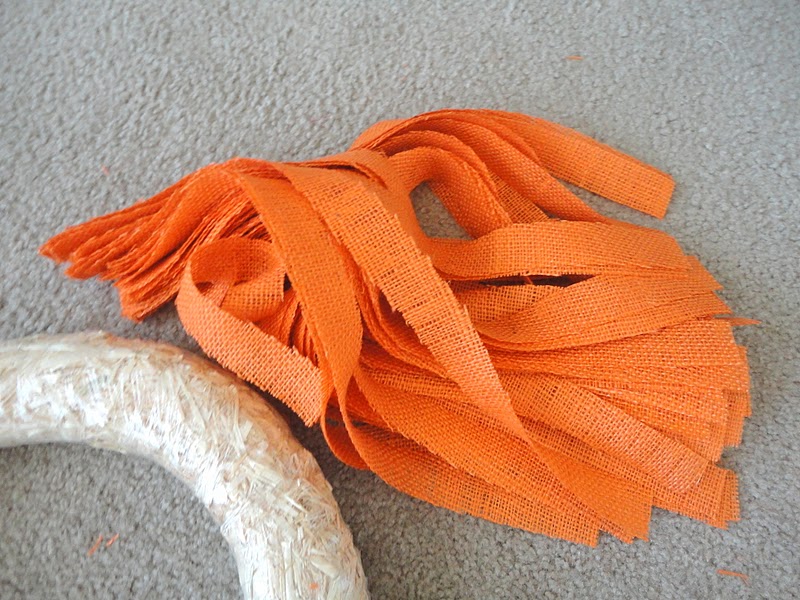
Cut burlap into 1 1/4 x 17 inch strips


Grab your pile of strips and your wreath and get tying. Be careful as you tie- the burlap will want to fray and separate, I had a few break when I pulled too tightly while tying. Stagger where you knot it so that it is nice and full.

By the end, you will be covered in burlap strings and fuzz!

Then just add a ribbon (I stapled mine to the top side of my door) and admire.

8.26.2011

Crafting for Baby | Part 2

Here is another quick project I made for baby. Of course, it would have been even quicker had I not made a boy and girl version, but what fun would that be? I basically followed the tutorial over on Cluck Cluck Sew. All it took was two yards of fabric, plus a few scraps for the straps, some velcro and in 30 minutes you're done.


I've already put it to use, and it's already kept some grimy hands from touching my baby.

8.08.2011

Chicken Wire Earring Frame

I've had this project in my head for a while now, okay several years now. I don't own a jewelry box of any sort, so my earrings currently reside in a large cardboard jewelry box- you know the kind that a nice pair of earrings or a necklace comes in from the jeweler. They'd get tangled and I never knew what all of my options were. Since I'm trying to keep busy lately, I decided today was the day to finally just do this project.

I headed to a local thrift/antique store and bought a large frame without glass. It was sloppily painted white, so I came home and gave it a few more coats of white and topped it with a pearl finish. 

Once it dried, I measured the opening, and cut some chicken wire [I bought mine at my local Home Depot. It's back with the fencing materials in the lumber section, but you can always ask an associate for help finding it.] about an inch bigger on each side. Then I used my staple gun and stapled it to the back of the frame. I didn't take a picture of this next step, but because the edges of the wire were scratchy and could scratch up my wall, I put some duct tape over the raw edges for some padding (I was going to hot glue some seam binding over the wire edge, but didn't have enough in the right color so I took the easy route with duct tape. I think eventually I'll take the tape off and do it right.)

Then I hung it on the wall. I just put a few nails in the wall and hung the chicken wire loops over each nail.

 Then it was ready to get some earrings. After hanging them all up, I realized that my collection is pretty sad- looks like I need to do some shopping ;)


Finally, all of my dangling earrings are out where I can see them to quickly find a pair to match my outfit.  I think I may get some S-hooks to hang up some bracelets, and I'm sure you could hang necklaces  the same way too.

Amazon Affiliate