Showing posts with label craft. Show all posts

1.20.2010

In the Dog House

If your child is anything like mine, then there may be a whole zoo of animals strewn about the house at any given time. We had to ban the big ones from her bed, because they left her no where to sleep. So we decided to give these animals (namely the puppies) a place of their own.


This is a simple and quick project to involve your kiddos. We had this box from Costco- turn it upside down, glue on some grass and flowers, add a little name plate, and ta-da- a pint-sized dog house. I often find my 2-year-old halfway in there with the animals- She loves it!

12.07.2009

Inexpensive JOY

True JOY comes for free. This Christmas season brings so much joy as we celebrate the true meaning of Christmas and spend time with loved ones. The inexpensive JOY I'm talking about is the paper mache sort. This is a really quick, easy, and inexpensive holiday project you can add to your list... I know my list keeps growing because there are so many fun ideas for the holidays.


Supplies:
-paper mache letters (or wood works too... I just go for whatever is cheapest and cute)
-enough scrapbook paper to cover your letters
-mod podge
-paint for back and edges
-scissors or exacto knife
-paintbrush
-sponge

Instructions: (sorry no pictures... this was another "hurry do this before the kids wake up" kind of project.)
1. Trace around your letters onto scrapbook paper.
2. Cut out scrapbook paper letters, and trim where needed to fit your paper mache letters.
3. Paint your letters and allow to dry.
4. Use mod podge to adhere scrapbook paper to your letters.
5. Distress edges using a sponge and your paint and allow to dry.
6. Apply a coat of mod podge over your scrapbook paper and paint.
Optional: tie ribbons, wooden shapes, etc. to accessorize your letters. Have fun!

May the JOY of Christmas fill your home this holiday season!

12.02.2009

Christmas Advent Activity: Dough Ornaments

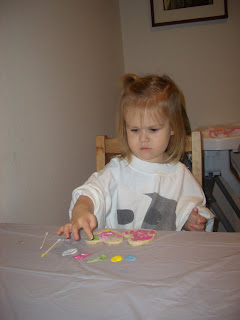
To kick off the first day of December, we did our first advent activity: Dough Christmas Ornaments. In the morning we made the dough, cut out the shapes, and cooked them. At night, when Daddy got home from work, we painted them. K had so much fun with the paint, and I'm sure you and yours will too!


You could make them really cute and then tie them onto gift packages with some cute ribbon.

The fun thing with these ornaments, is you can cut them any shape you want. Use cookie cutters, cups for circles, or your child's hand to shape your dough.

There are a lot of recipes out there on the internet for dough ornaments. Here is the recipe I used because it was the one that I had all of the ingredients to. Beware, if your child is like mine, they will want to try the dough, only to find out that it is "yucky!" and spit it out. They do look exactly like sugar cookies but taste nothing like them!

Christmas Dough Ornaments:
2 cups flour
1 cup salt
1 cup water
(I also read that you can also add spices such as cinnamon, nutmeg, etc. to make them smell yummy.)

-mix flour and salt.
-add water a bit at a time until completely moistened. add more flour/water so that the dough isn't too dry or too sticky.
-knead until smooth.
-roll out onto floured surface.
-cut into shapes. use a straw to make a hole to hang your ornaments from.
-bake at 200-225 for approximately 2 hours. watch to make sure they don't burn. (I flipped mine after 2 hours and cooked them for another hour or so to make sure they were nice and hard and dry.)

-let them cool thoroughly and then decorate with paint, markers, glitter, etc.
-seal them using varnish.
-tie a ribbon through the hole and display for all to see!

3.13.2009

Gone Fishin'

With the amount of rain we're receiving down here in Texas, we'd probably only have to walk a few feet to find a fishing hole! Since the weather is so wet outside, I've been doing some Spring cleaning. One thing that needs to be dejunked is my computer... pictures, pictures galore! I came across pictures of this project I made for K's first birthday (that was 8 months ago!) I guess I forgot to post it on here. Here she is in all her scaley grandure:
I made her out of materials I already had sitting around, except for the wheels. I sketched a fish shape on some scrap wood, had free reign of my dad's plethora of wood-working tools, and made this fun toy for a then beginning walker.
I think she turned out pretty cute. K loves to try and see how fast she can go around corners without Ms. Fishy tipping over...

2.24.2009

Craft Area Sneak Peak

(I know, not much of a sneak peak, aren't I mean?)
This past Saturday, the hubs and I went shopping for my new furniture. In under two hours (because we didn't have K with us, thanks to my mother), we had found what we needed/wanted and were on our way to pick up K. As soon as we got home, she went down for her nap and we went to town putting together the furniture and setting up my space. For the past few days I have been having so much fun organizing, sewing fabric storage baskets, and decorating. I got to pull out all of my little sewing and crafting goodies and see their loveliness again. There are still a few last minute touches to make my space more complete (I'm sure it will always be morphing). Then I will take pictures and let you all see where I will be crafting away.

2.14.2009

Loveable Kreations

Happy Valentines Day everyone! My sweet family and I got in the spirit of Valentines Day this year more than usual. I wanted my daughter to enjoy the holiday, plus it gave us lots of fun things to do and keep busy. For family night we made valentines for each other.
l. to r. : Daddy's to Mommy, Daddy & Mommy's to K, Mommy's to Daddy
K had fun making valentines too. She made the big ones for her grandparents, and the little ones for mommy and Daddy. The pink one is for daddy (If you can't tell, the sequins make the letter "D" for daddy on the pink heart, and an "M" for mommy on the red heart.)
Early in the month I made these little pom-poms. They're kinda silly, but K has worked up quite the little pitcher's arm from throwing them around.
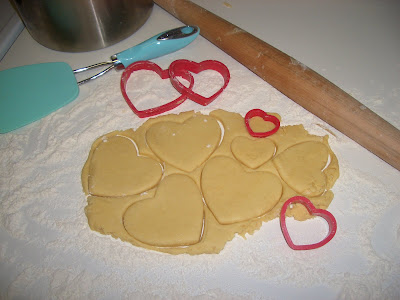
To pass time while daddy was at work, we made sugar cookies. K helped hand me the ingredients and when the cookies were done she sampled to make sure they were good!
Now, I just have to brag on my mom for a second. She showed up at our place with this lovely little bag. It was filled with homemade turtles! D loves turtles and I have to admit, I'm eating one right now as I blog. She even homemade the caramel- YUM!


Can you tell that we like them? This is just the start of our celebrations, I can't wait to see what else is in store! I hope you all have a deliciously sweet and happy Valentines Day!

2.11.2009

"Vintage" Trims

My mom recently returned from a trip out to CA to clean out her aunt's old home. My great aunt was big into sewing and had lots of fun things left in the home. Here are some of the fun trims (I love ric-rac for kids) & notions that my mom brought home for me. I'm thinking of making something for K out of them. Then she can have a keepsake made from her great-great-aunt's supplies. Such fun and colorful ric-rac!

10.30.2008

Pumpkin Bears

These little bears are a fun little project to make for your little ones, to stick on top of a gift, or to place around the house. For full intructions visit here.

Amazon Affiliate