Showing posts with label Handmade Holidays. Show all posts

4.13.2017

Resurrection Easter Eggs

This resurrection easter egg countdown has been done and posted about all over the internet. This is just my version combining some of those I found. I chose the events I wanted to touch on most, but there are tons of options out there! We made these for Activity Days and the girls can go home and teach them to their families.

These are the little items included in 11 of the 12 eggs, the 12th egg is empty to represent Christ's resurrection and the empty tomb.

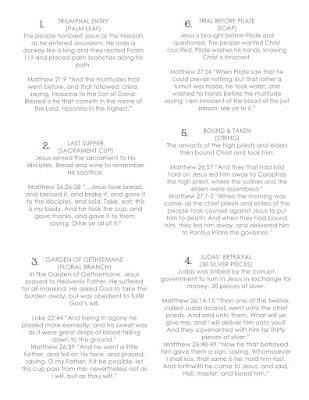
We numbered each egg and included a printed quote and scripture along with the item in each egg.

Then we put them in a cute bag and tied it up with a resurrection picture card.

These make great gifts for family, friends and neighbors! Below is a free printable of the files I made and printed. Again, they are a compilation of others across the internet, so I take no credit for this idea!


11.01.2016

Halloween

With our home being on the market during October, I didn't want to go all out with my Halloween decor. I thought spider webs and bats might scare off potential buyers. Instead, I kept our decor very simple and pretty.

We did however, have fun with our Halloween costumes! I normally like to try and coordinate the whole family, but the kids wanted different things, so I just let them be what they wanted to be.
The boys wanted to be Teenage Mutant Ninja Turtles. This costume was super easy to create. I bought green pj tops and pants from Primary.com. These can double as actual pajamas after Halloween- win-win! I made felt ninja masks, and made turtle shells out of large roasting pans spray painted green.

{This post contains affiliate links below, which means I receive compensation if you make a purchase using this link. I was not provided free product, and my opinion is my own, but I only recommend products I have used and LOVE, and hope you will too!}

I also sprayed their hair green with THIS.

Raphael:

Michelangelo:

Leonardo:

My daughter wanted to be something creepy. We settled on a ghost and came up with my favorite costume to date! I made a cape out of several layers of tulle (I basically followed this TUTORIAL from Martha Stewart for the cape,) She wore it over a white old fashioned night gown I made as well. I painted her face to make her look dead and she was thrilled!
**Keep scrolling for the best part!!**
And apparently even ghosts like a little donut challenge!
When nightfall came, this ghost was back to her spooking duties:


How'd we get her to glow? I used THESE LED battery operated lights that we wrapped around under her tulle cape. She was the hit of all our Halloween festivities!

As for the grown-ups, we dressed up as Sheriff Longmire and a local native. If you haven't watched the show, you need to!
Getting one of our kids to take our picture was easier said than done.

It was a successful Halloween season! The best part was that we had a showing for our home on Halloween nigh, and they ended up making us an offer and buying! Maybe those simple flowers and pumpkin sealed the deal ;)


12.14.2012

JOY Blocks

A friend of mine was put in charge of the decorations for our church Christmas party. She quickly called me on board to come up with how to decorate the tables... all 30 of them!! With the budget we were given and the amount of tables we had to decorate, our options were limited. I could have crafted things for each table, but I wasn't really feeling up to the task of making 30+ handcrafted items per table (and craft supplies can be pricey too...) We just decided to make it easy, but still cute. We set out red and white poinsettias on each table, along with wood JOY blocks.

I followed the same basic idea as when I made the USA blocks for my Patriotic Mantle.

This time I bought 2"x3" boards instead of 2"x4" since the letter stamp I was going to use was tall and skinny and I didn't need the 4" width. I was just going to load the 3 boards into my van and cut them at home, but the friendly workers at HD offered to do it there.


69 blocks later, I was headed home. I then sanded all 12 edges of each block. Do the math... that's 828 edges. My hands were red, and I had two blisters afterwards. They I had my friend paint half of the blocks, and I (meaning I roped my hubs into helping) painted the other half. Once they were all painted I stamped J O and Y onto the blocks. DONE. I could have sanded and distressed the edges, but I had NO desire to sand those 828 edges again. (So much for keeping my crafting to a minimum.)


The morning of the party, my daughter and I went over to the church to decorate. We spread out the table cloths, put out the poinsettias, and then put the JOY blocks out. My daughter loved that part.


It was simple but nice. The best part was that we sent the poinsettias and blocks home with people to be given to neighbors, needy, or anyone to whom we felt like spreading some JOY!

12.15.2011

Two More Stockings

When my husband and I were first married, I didn't own a sewing machine. For our first Christmas, I wanted to make our stockings. So I stitched every piece by hand. They were padded, fully lined, had heel patches and a top cuff. I think my hands were raw by the end. When my first baby came along, I finally had a sewing machine and could put hers together in no time. Two years later, I made our son's stocking. Check out THIS POST to see pictures of their stockings. This year we've added two more stockings. One for our new little baby, and one for Jesus. As I make each child's stocking, I don't give myself any restrictions. I don't care if one stocking matches another. I just pick fabric that reminds me of that child. Our daughter's is flowery and girly. Our first son's in cowboy themed- he was our first child born in Texas. And this last stocking is sock monkey themed, for our hairy, cuddly boy.

This year I also made a simple stocking for Jesus. I made this one our of natural cotton and some white linen. Simple, yet beautiful. Many of you may already have one or have heard of this idea. Sometime during the Christmas season (some do it on Christmas Eve) each member of the family writes something down on a piece of paper that they are going to "give" to Jesus. It's a resolution of sorts. Maybe you will try to serve others more, share more with siblings, and the like. Then the following year, we get to look back on our gifts and see how we've done. 

Our stockings are hung, now it's time to fill them up!

11.29.2011

Christmas Wreath

This year I was struggling to come up with a Christmas wreath idea. It seems as though every idea has already been taken. I was drawing a blank. Then, it came to me while crocheting some other project. (There are always about 3 crochet projects going on at the same time. They always get partially done, I get bored of it and move onto another crochet project . . .) So as I was making a scarf, hot pad, or beanie of sorts, I decided that this year, my wreath would be crocheted. You are probably envisioning something very grandmotherly, though there is nothing wrong with being grandmotherly- my mom is a grandmother and quite stylish, young, and modern. This is what I ended up with:


I used two skeins of yarn, in two different shades of green, and crocheted them together- I love the heathered look it gave. I used my wreath from last year- it was wrapped in aqua nubby yarn. I was lazy and left the yarn on the wreath- that's why you see bits of aqua peeking through. I'm loving the texture of this wreath! 

*************************

Here is a brief non-technical pattern. I used a 12" foam wreath. You will have to adjust to the size of your wreath. 

Chain 17, Turn, Skip first 2 chains, DC across, * Chain 2, Turn, DC across.* Repeat from * to * for 45 rows or until your rectangle is large enough to wrap the circumference of your wreath. Finish off, don't cut yarn.

Join short ends of your rectangle to form a big loop. I just threaded them on an embroidery needle and slip stitched through DCs and beginning chained row. Wrap rectangle around your wreath and now sew the long lengths of your rectangle together to connect around wreath. Knot and tie off, weaving in any yarn tails.

I then attached some felt flowers I made using this pattern: Not Martha's Felt Dahlia Flower


Now my door can MERRILY greet any Christmas time visitors!

12.20.2010

Yummy Recipe & Freebie

I found this yummy and super easy treat recipe the other day and we've already made it three times! It's a fun one for the kiddos to help with and my little munchkin loved unwrapping kisses then later pressing m&m's into the melted chocolate. It's a Pretzel M&M Kisses (or Hugs) combo that I found on TaDa! Creations

We couldn't find the ring pretzels, but found the window shaped ones, and I actually like having more pretzel base to add a salty crunch- yum! These are a fun addition to Christmas goodie plates, or put a bunch in a bag and tie with one of the Christmas Gift Tags that you can download for free!

(These images below are low res copies, the ones you'll download are high res PDFs)

Just click on the design you like to download the PDF, then print out as many as you'd like for goodie plates, Christmas presents, or whatever else you're giving this holiday season.

12.01.2010

Advent Activity #1: Ornaments

It's the first day of December so we got to pick out our first activity in the advent calendar. After featuring all of those fun advent calendars, I was itching to make a new one. But alas, I got busy with other projects, and our one I made three years ago was still cute enough :)

Tonight for activity #1, we are decorating ornaments. Last year we made our ornaments with a salt dough recipe. This year, I followed the same technique for making my pumpkin garland using oven-bake clay, and cut out some Christmas shapes. My daughter claimed the snowman already because she wishes she could have snow here in Texas.

What are you doing to kick off December?

11.18.2010

DIY: Wreath Roundup

Cranberry Wreath
Want to make this beautiful cranberry wreath? Learn how over at The Idea Room.


Yarn Wreath with Felt Flowers
The options are limitless with this fun wreath. Use different colors of yarn and felt to make it for the various holidays! Learn how to make it at Take Heart.


Coffee Filter Wreath
This wreath is reminiscent of the book pages wreath, but uses a different material- coffee filters! You can make it with either white or natural colored coffee filters. Head on over to Polly Want a Crafter to find out how.


D.I.Y Pom Pom Wreath
The funky pom pom wreath is all the rage lately. It may take some time, but the results are so fun! Head on over to Bleubird for the tutorial.


Ballard Inspired Alphabet Wreath
What a fun way to use your monogram for the holidays. Head to Decor Chick to learn how to make your own alphabet wreath.


Holiday Yarn Wreath
If you're a knitter, crocheter, or crafter in general, this yarn ball wreath is perfect for you. Recaptured Charm shows you now to make your very own, no knitting needles required!

11.15.2010

DIY: Advent Calendars Roundup

December is just a few weeks away. Half of that time is spent eating during Thanksgiving. So that means you need to get a head start on your holiday crafting. First thing to make is an advent calendar so that you are ready with it on December 1st! Here are a few fun ones to make, complete with tutorials! Happy Holiday Crafting!!

Advent Calendar Pockets
Find out how to make this cute pocket advent calendar over at allsorts.

Felt Circles Advent Calendar
Each day when you grab these cute felt circles, a yummy treat comes down with it. Learn how over at She Knits Shizknits.

Baby Socks Advent Garland 
Gather holiday colored baby socks, hang them on a line, and fill with goodies. Head on over to Martha Stewart to make your own.

Little Birdie Advent Calendar
How can you go wrong with these cute little birdies? Make your own flock with Skip to my Lou.

Simple Spool Advent Calendar
I love vintage wooden spools. This one is so unique! Make your own over at Just Something I Made.

Embroidered Felt Advent Calendar
A pocket full of goodies everyday! Make your own with The Purl Bee.

DIY Pottery Barn Advent Calendar
Forget forkin' out the big bucks. Head on over to Bumblebee & Sophie to make yours custom and on the cheap.

12.07.2009

Inexpensive JOY

True JOY comes for free. This Christmas season brings so much joy as we celebrate the true meaning of Christmas and spend time with loved ones. The inexpensive JOY I'm talking about is the paper mache sort. This is a really quick, easy, and inexpensive holiday project you can add to your list... I know my list keeps growing because there are so many fun ideas for the holidays.


Supplies:
-paper mache letters (or wood works too... I just go for whatever is cheapest and cute)
-enough scrapbook paper to cover your letters
-mod podge
-paint for back and edges
-scissors or exacto knife
-paintbrush
-sponge

Instructions: (sorry no pictures... this was another "hurry do this before the kids wake up" kind of project.)
1. Trace around your letters onto scrapbook paper.
2. Cut out scrapbook paper letters, and trim where needed to fit your paper mache letters.
3. Paint your letters and allow to dry.
4. Use mod podge to adhere scrapbook paper to your letters.
5. Distress edges using a sponge and your paint and allow to dry.
6. Apply a coat of mod podge over your scrapbook paper and paint.
Optional: tie ribbons, wooden shapes, etc. to accessorize your letters. Have fun!

May the JOY of Christmas fill your home this holiday season!

12.04.2009

Stockings Hung (and made) with Care

I searched my blog, and realized that I never posted the stocking that I made K last year. Now that I have B's stocking done, I'll post pictures of both. Kiera's is a sweet floral with the cheery red polka-dot and pink pom-poms to add a bit of Christmas whimsy.

I've been trying really hard to not spend any money on anything I can make and do myself, as well as not spending on things that aren't absolutely a necessity. I saw lots of cute fabrics online that I wanted to make B's stocking out of, and then I realized I had perfectly cute fabric here that I could use. I pulled out the trusty Cowpokes fabric (which is perfect for B since he's the only true Texan in our home.) I bought a smidge of the red stars, used some red ric-rak I got from my great-aunt's estate sale, and some yardsale jute I braided for the hanger.


Now they're ready for Santa to fill them with goodies. Handmade goodies that is!

12.02.2009

Christmas Advent Activity: Dough Ornaments

To kick off the first day of December, we did our first advent activity: Dough Christmas Ornaments. In the morning we made the dough, cut out the shapes, and cooked them. At night, when Daddy got home from work, we painted them. K had so much fun with the paint, and I'm sure you and yours will too!


You could make them really cute and then tie them onto gift packages with some cute ribbon.

The fun thing with these ornaments, is you can cut them any shape you want. Use cookie cutters, cups for circles, or your child's hand to shape your dough.

There are a lot of recipes out there on the internet for dough ornaments. Here is the recipe I used because it was the one that I had all of the ingredients to. Beware, if your child is like mine, they will want to try the dough, only to find out that it is "yucky!" and spit it out. They do look exactly like sugar cookies but taste nothing like them!

Christmas Dough Ornaments:
2 cups flour
1 cup salt
1 cup water
(I also read that you can also add spices such as cinnamon, nutmeg, etc. to make them smell yummy.)

-mix flour and salt.
-add water a bit at a time until completely moistened. add more flour/water so that the dough isn't too dry or too sticky.
-knead until smooth.
-roll out onto floured surface.
-cut into shapes. use a straw to make a hole to hang your ornaments from.
-bake at 200-225 for approximately 2 hours. watch to make sure they don't burn. (I flipped mine after 2 hours and cooked them for another hour or so to make sure they were nice and hard and dry.)

-let them cool thoroughly and then decorate with paint, markers, glitter, etc.
-seal them using varnish.
-tie a ribbon through the hole and display for all to see!

Amazon Affiliate