Showing posts with label Sewing. Show all posts

8.29.2016

Custom Boho Wedding Dress

When one of my favorite girls and previous babysitters told me she was engaged and wanted me to make her wedding dress, I was SO excited! Nervous, but excited. I mean it's only one of the most important dresses a woman will ever wear. No pressure!


We got brainstorming ideas right away. She knew she wanted a lace crop top look, with a fitted gentle mermaid skirt, so we designed based on that.


I had never made this style of skirt before, so I acted like I was from Project Runway and did a muslin mock up first.

After I fitted the muslin to her body, it was time to cut into the good fabric. I did a two layered skirt with a satin base and chiffon overlay. 


We used bridal buttons wherever possible!

Then it was time to start on the top. The bride wanted a dipped hem in back:
I handcut around some of the edge flowers to use as a trim along the back dipped hem. Then I hand sewed each of them on.
The top came together quickly. This was before the neck facing was applied.


We did several fittings to get the dress to fit just right.
And when wedding day arrived, the dress fit perfectly!
Such a happy day for a beautiful bride!

8.07.2016

Birthday Dress

Not only did I make myself a birthday shirt for our date night, but I also busted out a fun birthday dress to wear to church. The dress has a basic shape, but the asymmetrical pleated hem is what makes it fun! I paired the fun black and white fabric with pink suede pumps for a fun look!

8.06.2016

Lace Birthday Shirt

I had some leftover fabric from the dress I made my daughter for her baptism. I knew I wanted to use it because it was beautiful, expensive, and from Mood, but there wasn't much to work with. I finally decided to make myself a simple shirt for my birthday. It's a basic shape, but the fabric makes it special!

4.03.2013

Easy Minky Baby Blanket

I posted about a minky baby blanket that I made for a friend's baby, and here is the quick tutorial to go with it. These blankets are fairly easy to make, and can be completed in less than an hour. They are super cuddly and so cute.

Materials needed:
1 yard minky
1 yard cotton, satin, or flannel fabric
1-2 packages satin binding (at least 4 yards length total)
coordinating thread

Instructions:
1. Lay out your front side fabric and make sure that the edges are straight and square. Round out the corners by tracing around the edge of a plate or can with a pencil and trimming off excess (I didn't do this then, but did it later. Either way works.

2. Baste satin binding trim around the front side fabric using a 3/8" seam allowance, onto the right side of the fabric. Overlap edges of binding where they join.

3. Lay out your minky, right side up, smoothing out any wrinkles. Place front side fabric on top of minky, right side down. Trim off excess minky (or trim after sewing like I did, because I was too lazy...) and pin through all layers.

4. Using a 1/2" seam allowance, sew through all layers, making sure to leave an opening.

Here's the seam opening:

I left about 4 inches open.

5. If you haven't already done so, trim off excess minky now, clip corners but don't snip through the seam.

6. Now flip the blanket right side out through your opening.


7. Now you can hand sew up the opening (which is what I did) or top stitch around the entire blanket, catching the opening in your top stitch seam.

Done!


Baby Girl Showers

Here are a few of the fun girly things I've made for some of my dear friends. My kids each have their own special blanket, (which they have recently started calling "nonnies" because that's what the youngest calls his...) all of which have super soft minky on them. So when making a blanket for a sweet baby girl, I knew it had to have this cuddly fabric too. I put minky on one side, cotton print on the other and a silky trim around the edges. And I'm happy to say that this blanket is getting lots of good use from the most adorable baby girl!

Click HERE for a link to the blanket tutorial.

I used some of the scrap fabric to embellish a burp cloth, and crocheted a little beanie for her too. I love that pink little flower.


Another one of my friends is expecting twin girls! I made her two coordinating carseat canopies. They have the same pink fabric on the back side and coordinating fabric for the front side. I added some cute little bows to make them even more girly. Sorry no tutorial, but there are tons of great tutorials across the internet. Now I just can't wait to meet the two cuties in a month or so.


It seems like the rest of us pregnant ladies are all expecting boys! So on to boy crafting we go!

1.26.2013

Sister's BABY Shower

I cannot even begin to tell you how excited I am that my sister is having a baby! I will finally become an aunt, and I have already been enjoying spoiling the coming baby. What's even more fun, is that her and I are both expecting boys within months of each other. Best Friends & Cousins!! CANNOT WAIT!

So when a friend offered to throw my sister a baby shower, I was first on board to offer to help in any way I could.

First, I began by designing the invites:

It was held at the other host's home, so she did most of the decorations, I simply contributed at chalkboard bunting that I wrote BABY on- no pictures of that project...

We had some yummy food:

Played a few games:
We played the ever popular Points in Your Purse game. I created this little printable (which will be available soon) and some ladies came up with crazy high scores!

We also played a really funny game where you chew up some bubbly gum then sculpt the gum to look like babies. We then voted on our favorite.

Then we, or course, opened presents. Here's what I made for my sister, or rather for the BABY!

Hand-stamped onesies. I cut out some simple shapes from foam, then stamped. 

Crochet bear beanie.

Triangle pieced car seat canopy. (I had been wanting to try out this triangle quilt that I pinned on Pinterest a while ago, and I figured this little canopy would be a good place to start. I paired it with a black & white striped and trimmed it out with piping. So fun!)

Now I just have to wait a bit longer to hold that little guy! Can't wait!

11.08.2012

Halloween Costumes

This year for Halloween, we dressed up as characters from Peter Pan, including Jake from Jake and the Neverland Pirates. I could have bought a majority of the costumes, but that's not in my nature, and I feel like a lot of the store bought options were flimsy and wouldn't stand up to my kids after more than a couple wears. These costumes would be put into their dress up bins, so I wanted them to last.

Here are the portions of the costumes that I made.
Peter Pan: I used this post on Make It and Love It as a guide. I made the leggings by just tracing some of my knit pants as a reference for size. 
Jake: I made the vest, head tie, and waist sash. The head tie and sash are just big rectangles with finished edges. For the vest I made a pattern on freezer paper, measuring my son as I went for size reference. I trimmed it out in yellow double fold binding, and added fabric covered buttons.
Tiger Lily: I made a simple tutu, fringe arm cuffs, and a felt feather headband. The tutu is made by cutting long strips of tulle, folding them in half and sewing 1" from the folded edge. I did this with each tulle piece and then fed elastic through the casing. I sewed ribbon the the two ends so that it can adjust even more as she grows.


Tinkerbell: I made a green tutu following the same method above.

For Tiger Lily's headdress, I made a cute wool felt elastic headband. I cut three pieces for each feather, two as the base, and one as the feather fringe- then I sewed all three layers together. I embellished the band with sequins and beads.

To finish their looks I added a shirt, cheap sweatpants, and boots to the Jake costume, I also made him a pirate map treat bad; a shirt and leggings to the Tiger Lily costume, I also wrapped her braids in leather cording; wings, a bun, and clothes of course to my Tinkerbell costume.

Sorry no pictures of me as Tinkerbell, but the kids are the cute ones anyways. They had fun running from house to house, and collected way too much candy. They costumes have already been put to use several times since Halloween, so I really do hope they hold up well!

9.19.2012

A Ghosty Pillow

We love Halloween, mostly because it ushers in all of the holidays. I don't love the spooky aspect of Halloween, but the kids enjoy a little ghost, bat, or spider here and there. I went into my fabric stash, grabbed a pillow form I had in the closet, and made this friendly little ghost pillow.

 I kept the colors neutral, making it match the rest of my home decor a bit better.

Subtly spooky!

Sorry there isn't an in-depth tutorial, but I didn't take pictures as I went. But here's what I did: I cut out a simple ghost silhouette, used heat n' bond to adhere it to the fabric for the front side of the pillow, zig-zag stitched around the ghost, and made an envelope closure pillow cover. Here's a great tutorial from Freshly Picked for how to make an envelope pillow cover.

6.27.2012

Homey Doorstop

Do any of you guys have self closing doors. My craft room door has this problem. I guess most days I shouldn't consider it a problem, because it's nice to hide the crafting mess from everyone's view. Like on days like these:

However, when the kids are playing in the playroom and I want to keep an ear out, or if I just want to not feel so separated from everything, I'd like my door to just stay open. And sometimes my craft room is actually clean, so I don't mind everyone seeing. Like on days like these:
(This room has since been updated, but I have yet to take a picture of it when it's actually clean.)

I guess I could look at or adjust the hinges, but I'd rather take the cute and crafty route. So, I made a doorstop.


I just pieced some fabric and felt scraps together to make this little house shape- I was going to go crazy, but life was calling. I filled it half with poly pellets (it's nice having a husband who works in the plastics industry who got me free samples) and the rest was stuffed with fiberfill. It works just nice and looks cute while on the job!

6.25.2012

A Mini Rag Quilt for Baby M

So many babies are being welcomed to the world right now. That means lots of baby showers, and some fun crafting projects. Here is the first rag quilt I've done. I made it with quilting cotton on the front, and flannel on the back. It was made for one adorable baby girl- Baby M. 


I had some left over scraps, so I added them to some cloth diapers to make a few matching burp cloths. 


She follows 2 brothers, so we were all eager to spoil her and her momma with everything girly and pink.


Welcome to the world beautiful M!

5.30.2012

Sewing 101: The Toolbox

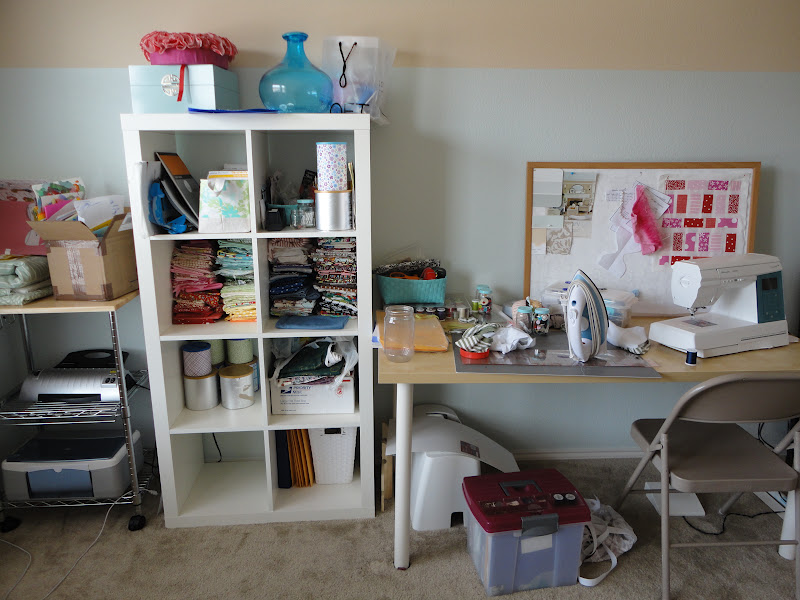
I've had several people ask regarding sewing, "Besides my sewing machine, what are some good tools to have?" Here is the list that I finally got around to making.

Sewing machine & appropriate bobbins- Having accurately sized bobbins is key to having your machine run properly. Check your machine manual to find what type of bobbin you need.

Fabric scissors- Select scissors that are sharp for ease of cutting fabric. Bent handle shears allows that fabric to lay flat while cutting. Left-hand scissors are available. I love my Ginghers.

Straight pins- Choose metal pins that are sharp. Dull pins can damage your fabric. Ballpoint pins are great for use on knitted fabrics. I prefer ones with a large plastic ball or a flat flower on top as they are easiest to remove when sewing.

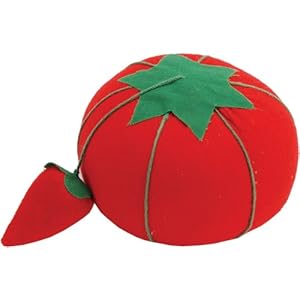
Pin cushion- There are a variety of pin cushions available. The common one is a tomato with pin sharpener attachment. Magnetic ones help hold pins in place. Wrist pincushions keep the pins easily accessible. I just use a big pillow-like cupcake and it does the job.

Tape measure- A firm but flexible tape measure is best. Make sure it doesn't stretch and that it won't tear. There are even kinds that will wind themselves up.

Seam ripper- A seam ripper is a sewer's best friend, experienced or not. They help easily remove unwanted stitches, and are much easier to use than trying to cut stitches with bulky scissors. Select one with a sharp point and a curved ball point edge.

Hand sewing needles- Pick a pack with a variety of eye sizes to fit thin to bulky threads and embroidery floss, as well as a variety of thicknesses to go through thin to heavy weight fabric.

Iron- A hot steam iron is a must when sewing. Use it to press seams open, hems in place, etc.


Not necessary, but very helpful tools:

Rotary mat- These protect your table when cutting with a rotary cutter and are great for measuring and cutting straight lines on fabric. They are self healing so you can use it for a long time. I frequently wipe mine down with a damp rag to rid it of lint.
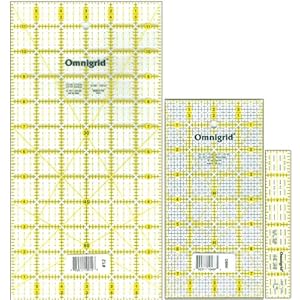
Clear plastic ruler with grid- These are especially helpful when quilting, but I use mine multiple times during almost every project. I have one with light text on one side and dark on the other, so the numbers can show up depending on the color of fabric you are cutting.

Rotary cutter- Use this in conjunction with the mat and grid ruler to cut smooth straight lines. You can cut through multiple layers of fabric at once depending on the fabric's thickness. The blade is VERY sharp, so keep those fingers out of the way. Choose one that has a safety guard.

Seam gauge- Pick a metal gauge with a double pointed slider. They are usually six inches long and are used to measure small areas such as hems and buttonholes.

Pinking shears- These are zig-zag scissors that can be used to finish a seam for those who don't have a serger. Cutting fabric zig-zagged helps it to fray less so that you don't get big long strings of tangled threads.

Marking pen/chalk- This is good for marking dart lines, pleats, and other sewing marking when using patterns. Select a device that can be easily removed from fabric- several varieties are available.


Feel free to ask any questions.
Happy Sewing Everyone!

Amazon Affiliate