Showing posts with label Nursery Decor. Show all posts

3.20.2015

Our Last Nursery

While pregnant with our last baby, we were in the midst of building a new home, selling our old home, and living with in-laws in between. That yearning to nest was replaced with packing and dreaming. We closed on our home on a Friday, moved in on Saturday, and baby came the next day, Sunday. The last thing I wanted to do after just having a baby, and readjusting to having a newborn schedule, was unpack and decorate, yet all I wanted was to feel settled and at home. It was a balance I was trying to figure out.

 Eventually, things came together, and it is now one of my favorite rooms in the house- not necessarily because it is the most decorated, but because of the sentiment behind the room. This was our last baby, thus, this is the last nursery. The last crib, the last rocker . . . So every time I walk in the room, I take in the details, the tiny elements, the sweetness. I just laid my baby (okay, he's 21 months, but he will always be my baby) down for a nap. Placing his heavy body down in his crib, I am realizing that these baby moments are fleeting. That the transition to a big boy room is pending, though I joke that I may keep him in a crib until he is FIVE! I've already started accumulating items for his big boy room, but for now I want to cherish the nursery.
There are scatterings of mountain and woodland animals throughout the room- miniatures, stuffies, prints . . .
My mom always makes each new grand baby a blanket. I knew I wanted a striped blanket like one I saw on The Purl Bee. We picked out colors and my mom remastered her knitting skills and made my babe this fun, modern, and super soft blanket. It is definitely a treasure.
The art prints above the crib came from The Caravan Shoppe. Super easy to buy, download, then print. Instant gratification! The rest of the art and wall decor was made by yours truly. Digital designs, an embroidered fox constellation, faux pewter initial, photos, and even some fun felt arrows.
My dad had some antlers laying around, and I asked if his grandson could inherit them- he can't say no to his grand babies! I wanted a playful modern take on an antler mount so I cut a triangle and painted it bright blue for the background.
Some scrap pallet wood I had leftover from another project got repurposed into a wall banner. That along with the dreamcatcher were my wishes for sweet dreams for our little one. The dreamcatcher was made using left over yarn from the blanket my mom knit.
Sitting rocking my baby, during the day with the sun pouring in, or in the wee hours of the night, were treasured this time around especially.

For his first birthday, my dad made some wood cuts. His name was on top of his cake, and later added to his collage wall because I couldn't part with it.
The mobile was a labor of love while I was pregnant. 10 crochet little stars in white and natural yarn, later joined, stuffed, and hung from a ring of twigs gathered from our yard. Every night as I put him to bed we sing Twinkle, Twinkle Little Star as I make the stars dance above him. He loves it, and I cherish those moments.

Sources:
Crib & Dresser- BuyBuy Baby
Rocker- Target
Side Table- Homegoods
Striped rug- Crate & Barrel
Curtains- Ikea
Curtain Rod- Target
Basket- Target
White Frames- Ikea
Tribal B&W Pillow- Ikea
Watercolored Animal Prints- Caravan Shoppe
Large Stuffed Fox- Anthropologie (similar)
Raccoon & Fox- Jellycat
Knit Raccoon- Blabla Kids

1.18.2012

Big Boy Quilt

I've been going through my photo files and came across pictures of my son's twin quilt. It's been done since last June, and he's been sleeping in it since then. So this is late in sharing, but with a project that takes that much attention, I have to share. 


His nursery had the following color scheme:
I had painted this canvas for his nursery. 
 I wanted to make the painting and the other details and pieces transition right into his big boy decor. Here's a picture of his nursery to give you an idea. I wanted to reuse the navy curtains and all the stuff on his shelves.

So I headed to my favorite local fabric shop Cabbage Rose to see if I could find some fabrics that would work. I needed 9 different fabrics for the design I drew up, and I came home with 8. I had some Heather Ross fat quarters at home that I thought I could use if I didn't find anything I liked better. So all together I had my 9 fabrics: 3 dark blue, 3 light blue, and 3 green.

I got to work cutting my squares . . . I needed 100.

 Then I laid them out on the floor. I didn't want the fabrics to repeat consistently, I wanted it random, so down they went.

Then I sewed each row together. Then two rows got sewn to each other. 

After sewing my five, two row pairings, I sewed in some gray sashing, and a gray border. Then it was time to quilt it. I considered machine quilting it, but since I hand quilted my older daughter's quilt, and loved the look so much, I finally decided that was the way to go. Up went the quilt frame, and the hand quilting began. I finished it in 3 days- a little here, a little there, till it was done.

Then, I trimmed down the batting and quilt back, sewed on some binding (machine sewed the first round, and hand stitched the top round to avoid seeing any machine stitches.) Then it was done and ready to get put to use! Our little guy wasn't quite ready to sleep in the big boy bed, and for the first week or so, he would ask for his crib. We put his crib in the toddler bed setting, and let him sleep there until he was ready. I think the little doggies, fish, and campers on the Heather Ross fabric helped him come around!

So here's what his room looks like today. We originally had the crib on the opposite wall from his bed, but we decided to give baby brother his own room for a while. So the room decor is in a transitional state for now. There are two of those bed frames that were my uncles' when they were little. Then my sisters and I used them, then our older daughter used it, and now it's the boys turn. I dream of the day when my two boys have their matching big boy beds lined up on the wall, but for now, at least one big boy has a cute quilt to sleep under.

2.14.2011

LOVE Poster

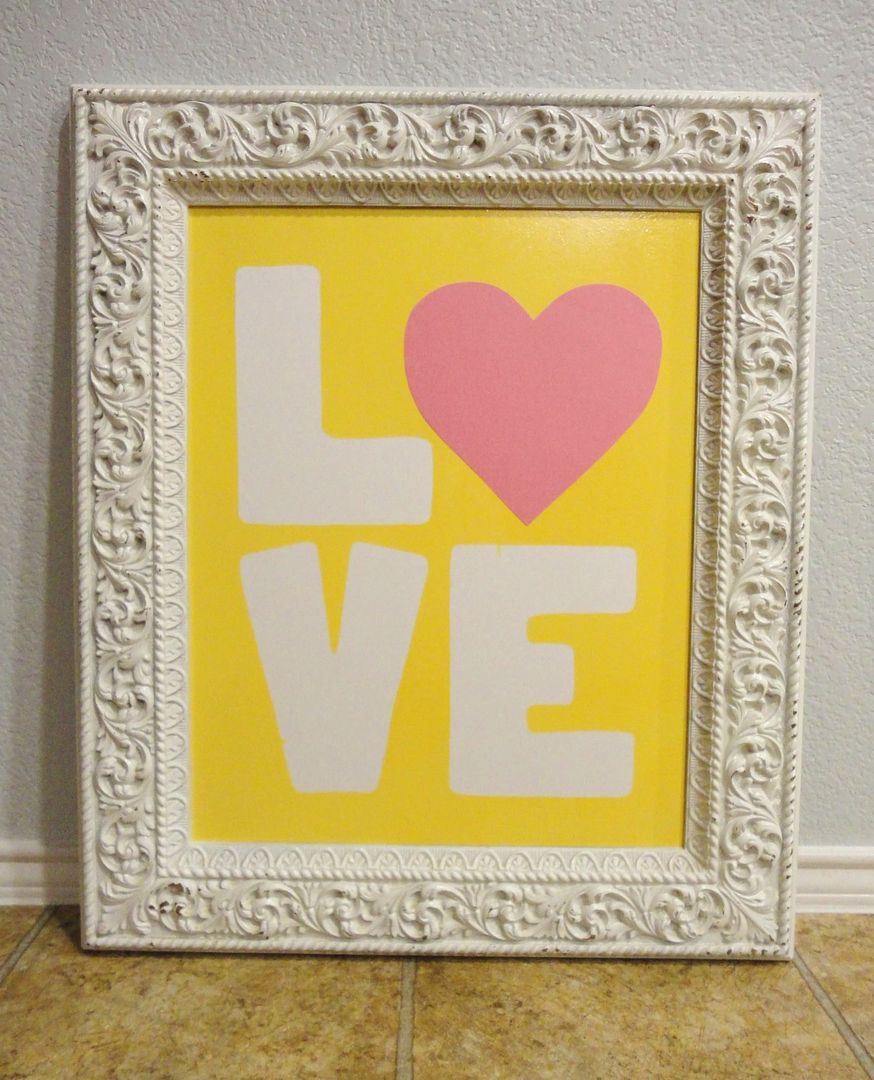
Lately, I've been adding a little yellow into my daughter's room (and all over the house for that matter.) I think I've been yearning for Spring and sunshine. I have a few other yellow projects in her room that I'll show once I take the time to photograph them. So for Valentines Day, I made my daughter this piece of art to hang in her room.

Photobucket

This frame is pretty big- the opening measures 20" x 28" I designed one digitally, but didn't want to have it printed on photo paper, and I didn't want to wait (or pay) to have it printed somewhere else. So I put my mind to work. I bought a sheet of white poster board. Cut out the L,V, and E out of contact paper, and stuck them on the poster board. Then I whipped out some yellow spray paint I already had and sprayed the paper until it was as yellow as I wanted it. I let it dry then peeled off the letters. Then, I cut out a heart from pink cardstock, stuck it on, then put the art in the frame. It looks so cheery to match the beautiful sunshine we had today!

10.27.2010

Giant Ruler Growth Chart

As a parent, it is so fun to see how your child is growing... though I often wish they would stop growing and stay little forever. Alas, they continue growing. So why not keep track and remember how little or big they are as they grow from a little infant to an independent child. There are so many growth charts out there. Many are really cute and unique, and you can find them to match practically any decor scheme. I however, wanted something simple, that wouldn't scream "child's growth chart!" So I set out to make one.

I went to a two stores, Home Depot & Michaels, and grabbed my supplies... thankfully those two stores are right next to each other.

Here's what you need:
3/4" x 10" x 6' wood board
Paint
1 pkg. black carpet tacks. They are about 3/4" tall and look like this:


Number stickers (mine are about 2" tall)
Scrapbooking tags (mine are circle tags with prepunched holes and sticky backs)
Ruler
Permanent marker


Instructions:

1. Paint your board and let it dry.
2. Distress your board (optional) I sanded the edges and then applied a brown watered-down paint to the exposed wood.
3.  I wanted my chart to measure up to 6'6", so I started my markings at 6". Lay a measuring tape or ruler on your board and use a permanent marker to mark every inch. Make the foot markings larger.
4. Apply your number stickers next to your foot markings
5. Securely attach to your wall at the correct height from the floor. (ie. I started my board at 6", so I attached it to the wall 6" above the floor.) Make sure it is level and straight.
6. As your child grows write their name, age, and height on a tag, and attach to board using a carpet tack. 
The best part is that you can take it with you if you move, without having to tear out a door frame!


Linking to:
Black Kats  Design

giveaways

Get your craft on Thurs.


9.28.2009

Framed

I made this frame for my bubs a while back, but was waiting to get pictures printed before I posted about it. I got about a bazillion cute pictures of him printed this afternoon, so now you get to see how the frame (and picture) turned out. I LOVE it. It hangs about his crib and one day I will not be too scared to let him sleep in a different room from me... then he too can appreciate my efforts, and his precious good looks!

(photos taken by the amazing Toni over at Urban Photo Studio)

7.02.2009

Burlap... in a Nursery?

I bought a bit of burlap a while back and had plans on turning into a table runner for our coffee table. However, after once again realizing that keeping our coffee table decorated was a thing of the past, my plans went on hold. I mean, isn't a coffee table the perfect play table for a toddler? It's just their height and it's right were all the action is. So that burlap has been sitting on my shelf, just staring at me, wondering when he'd get his chance to shine.
-----
On another, seemingly unrelated note... the kids' nursery is way too pink. Some things (flokati rug, pink curtains, paper lanterns...) are slowly being banished from the room into boxes, knowing their life will come back once K has her own room. But with a little brother entering the picture, we decided to save him from all the pink. Anyways, there was one piece of furniture that couldn't just be packed away- the toy shelf. Unfortunately, that too is pink. I glanced at it last week and had dreams of buying a new one... but then got an idea- a burlap bookshelf runner. I immediately went to work and came up with this:
The burlap goes well with the casual nautical theme, and the white letters make it PLAYful! Biggest plus, it covers a bit of that overwhelming pink!

6.16.2009

Meet Little Willis!

Remember this post a while back about my whale obsession? Nautical + whales + boy = perfect combo in my mind. I had been looking to buy a little whale softy for baby brother, but couldn't find one that I liked well enough. Thus, this spur-of-the-moment plush was created. Meet Willis the Whale:
He is a soft, stretchy light blue knit on top, and a gray wool on his belly, with french knot eyes. Being one of my first softies, there are things I now know to make one differently in the future (especially considering that I made it without a pattern...) He matches the sailboat pillow I made a bit ago. He is ready to be slobbered, chewed, and cuddled on!

6.09.2009

Nursery Accents

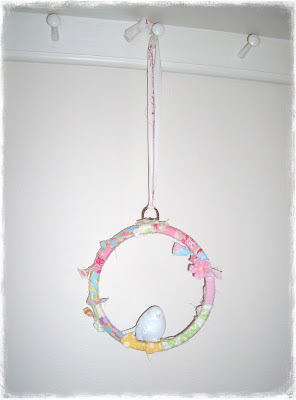
So I've made a little progress in decorating the kiddos nursery. The first was a project I saw on the Small Magazine's Smaller Blog a while back. There is a link to it on my Free Tutorials page. I found the bird for $1.50 and man was it ugly. I spray painted it white. See look: Then I found this flexi embroidery hood at the thrift store for $1.15 and it was ugly too ( I realize I probably could have found some other hoop-like thing to use, but I liked the look of the handle at the top. But that ugly hoop turned into this finished product, a birdy mobile: I just saved scraps while I was making K's quilt and Little Brother's bedding and used a few other scraps to cover the hoop. Overall the project cost what, $2.65, not bad!

Then, as I mentioned in my last post, I was on the hunt for a buoy and other nautical decor. My sisters found these for me at HomeGoods. They always have great accents. I was going to make the buoy myself but with the lower cost of this one, I decided to save myself the hassel (though I still think I may try it sometime this summer...)
I also got a fist knot, which I LOVE.


Now I just need to organize it all and hang up a few more things.

6.05.2009

Ready to Set Sail

After finding out that we were having a boy, the search for the perfect crib bedding began. Since big sister and little brother will be sharing a room in this apartment, my options were limited- I didn't want to combine too many colors and patterns so that the room would not be too crazy. I'm pretty picky and was having no luck. So my obvious solution was: make it myself. If you remember, big sister's new bedding is made using the pink and green prints from Tanya Whelan's Darla collection. So I decided to use two of the green prints (the ticking stripe and ditty) to make little brother's bedding. It was actually much cheaper than buying, and much easier than I was expecting. Here is the finished bumper.
A while back, when dreaming of how to decorate for a boy, I had great visions of doing a vintage nautical style. Since the two are in the same room, I have to limit this style a bit. Instead, I made this little pillow to go in his crib as the start to nautical decor. I'm thinking that now I want to get one of those rustic buoys to put somewhere in the room... I'm on the hunt for one with the perfect colors.
Here it is all together.
I love the way it turned out. Not to overbearing- simple and clean.
It looks great alongside big sister's bedding. I'll be sure to take pictures of the whole room once all the little details are added. Now all we need is little brother to arrive.

2.13.2009

Feminine Frills

After finding out we were having a girl, the bow buying began. Granted, I don't have many bows compared to most mommas, but I did have enough that they were becoming a mess. I had them clipped on a ribbon tied to a hanger for a while... and knowing me, that had to be fixed into something cute. So I made this handy-dandy bow and headband holder. I wish I would have made this before she was born, because we had TONS of infant headbands. Sadly, those are now packed away with all her other little things. It was a VERY easy project- so any of you momma's with girls can make it in a jiffy. I bought the wooden sign with hooks already in it- you should be able to buy these at most craft stores. I painted the edges and then modge podged on some scrapbooking paper that matched her room. Then I added two long ribbons to attach bows to. You can staple gun them on, use short nails, or perhaps duct tape them on. I heat finished the ribbon's edges to prevent fraying. Now hang up all your headbands, bows, or even jewelry and all your frills will be organized.

1.23.2009

Sweet Silhouette

I have been wanting to make a silhouette of K for a while now, and finally got around to doing it. I don't know why I waited, it only took a few minutes, plus a few minutes trying to get her to turn to the side long enough to get a picture of her profile. Plus, it turned out so cute. K walks up to it and says "Oh, baby" so lovingly. Now I will be able to look back at what her round baby face looked like when she is grown.
I started with a picture of her profile. I turned it black & white like so (not that important). I then drew a line around her silhouette.

Then, I cut out that shape, traced it onto white cardstock, cut it out and ta-da- a beautiful silhouette!

Now I have a personalized piece of art that I will love for years to come!

1.26.2008

Wooden Sign

I always saw many cute wall hangings at boutiques, so I decided to make one for K. They do wood cuts at Lowes for $.25 and then I just painted the rest. I matches her bedding so cute!

Bunny Pillow

This is a little pillow that is in K's crib. Babies like simple graphic shapes and I thought a bunny was a cute and fun animal to do.

This was made before I had my sewing machine, so it was appliqued on, and the pillow sewn around my hand- so tedious!

Amazon Affiliate