Showing posts with label Baby. Show all posts

3.20.2015

Our Last Nursery

While pregnant with our last baby, we were in the midst of building a new home, selling our old home, and living with in-laws in between. That yearning to nest was replaced with packing and dreaming. We closed on our home on a Friday, moved in on Saturday, and baby came the next day, Sunday. The last thing I wanted to do after just having a baby, and readjusting to having a newborn schedule, was unpack and decorate, yet all I wanted was to feel settled and at home. It was a balance I was trying to figure out.

 Eventually, things came together, and it is now one of my favorite rooms in the house- not necessarily because it is the most decorated, but because of the sentiment behind the room. This was our last baby, thus, this is the last nursery. The last crib, the last rocker . . . So every time I walk in the room, I take in the details, the tiny elements, the sweetness. I just laid my baby (okay, he's 21 months, but he will always be my baby) down for a nap. Placing his heavy body down in his crib, I am realizing that these baby moments are fleeting. That the transition to a big boy room is pending, though I joke that I may keep him in a crib until he is FIVE! I've already started accumulating items for his big boy room, but for now I want to cherish the nursery.
There are scatterings of mountain and woodland animals throughout the room- miniatures, stuffies, prints . . .
My mom always makes each new grand baby a blanket. I knew I wanted a striped blanket like one I saw on The Purl Bee. We picked out colors and my mom remastered her knitting skills and made my babe this fun, modern, and super soft blanket. It is definitely a treasure.
The art prints above the crib came from The Caravan Shoppe. Super easy to buy, download, then print. Instant gratification! The rest of the art and wall decor was made by yours truly. Digital designs, an embroidered fox constellation, faux pewter initial, photos, and even some fun felt arrows.
My dad had some antlers laying around, and I asked if his grandson could inherit them- he can't say no to his grand babies! I wanted a playful modern take on an antler mount so I cut a triangle and painted it bright blue for the background.
Some scrap pallet wood I had leftover from another project got repurposed into a wall banner. That along with the dreamcatcher were my wishes for sweet dreams for our little one. The dreamcatcher was made using left over yarn from the blanket my mom knit.
Sitting rocking my baby, during the day with the sun pouring in, or in the wee hours of the night, were treasured this time around especially.

For his first birthday, my dad made some wood cuts. His name was on top of his cake, and later added to his collage wall because I couldn't part with it.
The mobile was a labor of love while I was pregnant. 10 crochet little stars in white and natural yarn, later joined, stuffed, and hung from a ring of twigs gathered from our yard. Every night as I put him to bed we sing Twinkle, Twinkle Little Star as I make the stars dance above him. He loves it, and I cherish those moments.

Sources:
Crib & Dresser- BuyBuy Baby
Rocker- Target
Side Table- Homegoods
Striped rug- Crate & Barrel
Curtains- Ikea
Curtain Rod- Target
Basket- Target
White Frames- Ikea
Tribal B&W Pillow- Ikea
Watercolored Animal Prints- Caravan Shoppe
Large Stuffed Fox- Anthropologie (similar)
Raccoon & Fox- Jellycat
Knit Raccoon- Blabla Kids

7.31.2013

Hospital Thank-You Cards

After going into preterm labor and experiencing the hospital from a different perspective, I really became aware of how grateful I was for good nurses. My main nurse was incredible. She allowed me to make decisions regarding me and my unborn baby's health, unlike the triage nurse who acted as if I didn't have options or a say when it came to what treatment and actions they needed to take. 
I had already planned on making thank-you gifts for the nurses who would take care of and assist me during and after labor, but this earlier experience really sealed the deal, and I got creating soon after getting released and coming home. I was on bed rest, but this was something I could work on from the comfort of my bed. It also helped take my mind off all the millions of other preparations I wasn't able to do, like set up a nursery. I convinced my husband, who was adamant about my resting, that I was well enough to go with him to pick out the items from the store. 

I really loved the thank-yous that Jess from Craftiness is not Optional made for her nurses, and put pretty much the same stuff in my thank-you bags. Here's what we included:
- Chocolate bar
- Chapstick
- Gum packet
- Pen
- Hand sanitizer

I also designed a little thank-you tag to tie around each bag.
I used the bottom color options since we were having a boy, and tied them on with some colorful fabric scraps. I created the tags in two colors, with and without a message attached. Lucky for you, I making all four options available for download, so that you too can say thank-you to those who don't get as much praise- the nurses, midwives, doulas, and even family and friends. They are the ones there with you more time than the highly paid doctors :) and I think they deserve some thanks!


To download click on the option you want to be redirected to the download page.


**As with all my free printables, these are for personal, non-profit use only! Thanks**

4.03.2013

Easy Minky Baby Blanket

I posted about a minky baby blanket that I made for a friend's baby, and here is the quick tutorial to go with it. These blankets are fairly easy to make, and can be completed in less than an hour. They are super cuddly and so cute.

Materials needed:
1 yard minky
1 yard cotton, satin, or flannel fabric
1-2 packages satin binding (at least 4 yards length total)
coordinating thread

Instructions:
1. Lay out your front side fabric and make sure that the edges are straight and square. Round out the corners by tracing around the edge of a plate or can with a pencil and trimming off excess (I didn't do this then, but did it later. Either way works.

2. Baste satin binding trim around the front side fabric using a 3/8" seam allowance, onto the right side of the fabric. Overlap edges of binding where they join.

3. Lay out your minky, right side up, smoothing out any wrinkles. Place front side fabric on top of minky, right side down. Trim off excess minky (or trim after sewing like I did, because I was too lazy...) and pin through all layers.

4. Using a 1/2" seam allowance, sew through all layers, making sure to leave an opening.

Here's the seam opening:

I left about 4 inches open.

5. If you haven't already done so, trim off excess minky now, clip corners but don't snip through the seam.

6. Now flip the blanket right side out through your opening.


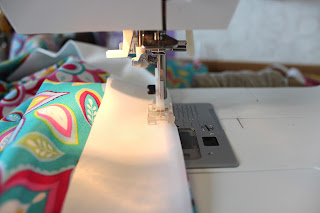
7. Now you can hand sew up the opening (which is what I did) or top stitch around the entire blanket, catching the opening in your top stitch seam.

Done!


Baby Girl Showers

Here are a few of the fun girly things I've made for some of my dear friends. My kids each have their own special blanket, (which they have recently started calling "nonnies" because that's what the youngest calls his...) all of which have super soft minky on them. So when making a blanket for a sweet baby girl, I knew it had to have this cuddly fabric too. I put minky on one side, cotton print on the other and a silky trim around the edges. And I'm happy to say that this blanket is getting lots of good use from the most adorable baby girl!

Click HERE for a link to the blanket tutorial.

I used some of the scrap fabric to embellish a burp cloth, and crocheted a little beanie for her too. I love that pink little flower.


Another one of my friends is expecting twin girls! I made her two coordinating carseat canopies. They have the same pink fabric on the back side and coordinating fabric for the front side. I added some cute little bows to make them even more girly. Sorry no tutorial, but there are tons of great tutorials across the internet. Now I just can't wait to meet the two cuties in a month or so.


It seems like the rest of us pregnant ladies are all expecting boys! So on to boy crafting we go!

1.26.2013

Sister's BABY Shower

I cannot even begin to tell you how excited I am that my sister is having a baby! I will finally become an aunt, and I have already been enjoying spoiling the coming baby. What's even more fun, is that her and I are both expecting boys within months of each other. Best Friends & Cousins!! CANNOT WAIT!

So when a friend offered to throw my sister a baby shower, I was first on board to offer to help in any way I could.

First, I began by designing the invites:

It was held at the other host's home, so she did most of the decorations, I simply contributed at chalkboard bunting that I wrote BABY on- no pictures of that project...

We had some yummy food:

Played a few games:
We played the ever popular Points in Your Purse game. I created this little printable (which will be available soon) and some ladies came up with crazy high scores!

We also played a really funny game where you chew up some bubbly gum then sculpt the gum to look like babies. We then voted on our favorite.

Then we, or course, opened presents. Here's what I made for my sister, or rather for the BABY!

Hand-stamped onesies. I cut out some simple shapes from foam, then stamped. 

Crochet bear beanie.

Triangle pieced car seat canopy. (I had been wanting to try out this triangle quilt that I pinned on Pinterest a while ago, and I figured this little canopy would be a good place to start. I paired it with a black & white striped and trimmed it out with piping. So fun!)

Now I just have to wait a bit longer to hold that little guy! Can't wait!

6.25.2012

A Mini Rag Quilt for Baby M

So many babies are being welcomed to the world right now. That means lots of baby showers, and some fun crafting projects. Here is the first rag quilt I've done. I made it with quilting cotton on the front, and flannel on the back. It was made for one adorable baby girl- Baby M. 


I had some left over scraps, so I added them to some cloth diapers to make a few matching burp cloths. 


She follows 2 brothers, so we were all eager to spoil her and her momma with everything girly and pink.


Welcome to the world beautiful M!

1.24.2012

I LOVE Sibling Shirts

Ever since I created my I Heart Sibling shirts for my kiddos back when baby #2 was born, I've had lots of requests for custom sibling shirts. It's so fun to come up with fun color combos to make the shirts coordinate. Here is the latest set I created for a friend's two adorable little girls.


I was on a fabric flower kick back when I made these shirts, so I threw in some little hair clips to match.

I love the playful fun colors of this set! Happy colors for happy girls.

10.26.2011

My New Diaper Bag

Okay, so it's not really new, new since I've been using it for the past couple of months since baby E was born. But it is newer than the diaper bag I used with my other two babes, and it's new to this blog. When I was expecting baby #3, I decided that I deserved to upgrade to a new bag. My prior diaper bag was a nice one from Kalencom that my mother bought me and I loved it. It is still in excellent shape though it's gotten a bit dirty. So instead of figuring out how to clean it, I decided I wanted a new one. After browsing for bags online, I always fell in love with the $200+ ones or I'd find one in a good price range and it wouldn't have all of the features (pockets, pockets, pockets) that I wanted. Thus, I decided it was time to pull out the sketch pad and pattern my own. I made sure to include all of the details I wanted: tons of pockets on the inside and out, longer straps that can hang over a stroller or shoulder, zipper top, sturdy yet soft structuring, fully lined, fun shape, detail trim, and awesome fabric. It took some brain power to figure out how to fully line it the way I wanted with no exposed seams white doing a zipper around the top curve, as I've never done it before, but I figured it out and here is the result:

Front

 Back with large flat pocket

Side- both sides have a gathered elasticized pocket, perfect for water bottles, sippy cups, keys, etc.

Front flap pocket with magnetic closure. I drew in this pocket half for styling sake and half to function as a pacifier pouch. However, it's more commonly used as the library card pocket. I added the fabric flower just for fun.

The inside: there are 7 pockets around the inside edges- 3 smaller elasticized on one side, 2 large elasticized on the other size (great for diapers and wipes), and one flat pocket at each end. Plus there is tons of free space in the middle to throw blankets, nursing cover, toys, etc. It has a super stiff rectangle insert in the bottom to add to its sturdiness and help it hold its shape. The great part is that it zips closed for security.

Cost breakdown (most items were bought with a 40%-50% coupon:

exterior fabric- $10.50 for 1.5 yards [This was the biggest steal making my project much cheaper than it could have been. This Thomas Paul fabric is regularly $35/yard but I bought it during a store moving sale at Calico Corners and got it for $7/yard- that's 80% off!]
lining, piping, and straps- $5
fusible fleece- $5
elastic- $2
magnetic closure- $2.50
zipper- $3

Total: $28!

I love this bag! The super low price combined with the fact that I made it hence no one will have like it and that it actually turned out exactly how I envisioned and drew it up, makes me love it even more!

8.30.2011

Not Just About Baby

Just because a new baby was coming, didn't mean that the older two weren't included in the crafting madness. Both big sister and big brother got their very own shirts to proclaim their status of Big Sis & Big Bro.


To make these shirts, I used the same process as I described HERE in a mini tutorial post.


They wore these shirts to the hospital when they met little brother for the first time. Both are happily adjusting to their new roles. Big sis is a big momma's helper- holding baby more than anyone in the house, burping baby, finding burp cloths, throwing away dirty diapers, and most appreciated- entertaining brother. So my older two wear their shirts with pride, just as they hold and love their baby brother with pride. Love my kiddos!

Amazon Affiliate