Showing posts with label Wood. Show all posts

12.14.2012

JOY Blocks

A friend of mine was put in charge of the decorations for our church Christmas party. She quickly called me on board to come up with how to decorate the tables... all 30 of them!! With the budget we were given and the amount of tables we had to decorate, our options were limited. I could have crafted things for each table, but I wasn't really feeling up to the task of making 30+ handcrafted items per table (and craft supplies can be pricey too...) We just decided to make it easy, but still cute. We set out red and white poinsettias on each table, along with wood JOY blocks.

I followed the same basic idea as when I made the USA blocks for my Patriotic Mantle.

This time I bought 2"x3" boards instead of 2"x4" since the letter stamp I was going to use was tall and skinny and I didn't need the 4" width. I was just going to load the 3 boards into my van and cut them at home, but the friendly workers at HD offered to do it there.


69 blocks later, I was headed home. I then sanded all 12 edges of each block. Do the math... that's 828 edges. My hands were red, and I had two blisters afterwards. They I had my friend paint half of the blocks, and I (meaning I roped my hubs into helping) painted the other half. Once they were all painted I stamped J O and Y onto the blocks. DONE. I could have sanded and distressed the edges, but I had NO desire to sand those 828 edges again. (So much for keeping my crafting to a minimum.)


The morning of the party, my daughter and I went over to the church to decorate. We spread out the table cloths, put out the poinsettias, and then put the JOY blocks out. My daughter loved that part.


It was simple but nice. The best part was that we sent the poinsettias and blocks home with people to be given to neighbors, needy, or anyone to whom we felt like spreading some JOY!

9.05.2012

Giant Chalkboard

Back to school was approaching and I found myself surrounded by school supplies and dreaming of chalkboards and freshly sharpened crayons. So on a whim, I decided to make a giant chalkboard before my oldest started kindergarten. My husband was out of town, so I loaded up the three kiddos, took out one of the seats to add some space for supplies, and headed to my favorite store- HD! 
I looked around at all the wood options, and found the perfect piece. I used a 5mm thick piece of underlayment measuring 4 feet by 8 feet. Underlayment is a plywood that is much smoother than regular plywood, plus it's thin and lightweight- perfect for hanging. I had a friendly worker cut it down to 3 feet by 6 feet. 

Then I picked out three 8 foot lengths of moulding to make a frame out of. This was the most expensive part of the project. I got some that was 89 cents a foot, but you can buy cheaper or more expensive depending on how much you want to spend and what you want the frame to look like.

Grab some chalkboard paint, 1- 30 ounce can is plenty, and a small high density smooth foam roller.

Supply List & Cost:
1 sheet of underlayment wood cut to 3'x6' - $10.85
24' of moulding - $21.36
Chalkboard paint - $9.67
Paint roller - $4.97

TOTAL- $50.72
(I had a giftcard, so my total was only $38)

Now load it all up, making an obstacle course of the van for the children.

After the kids went to bed, I spread out some plastic in the craft room and got painting. Following the instructions, I painted 3 coats of chalkboard paint on my underlayment. You have to wait 3 days before "seasoning" the board and using.

Then, I cut my moulding to make a mitered frame around my board. I just used liquid nails and clamps to attach the framing. When the frame is attached securely, do a finishing coat of paint and let dry.

My frame was done in time to use as a backdrop for my daughter's first day of school. (Well, I actually used the frame before I did the finishing coat of paint on the frame . . .) I had her write her name, and plan on taking subsequent pictures each year to compare.

Just last night, we hung the frame up on the wall so that we can doodle away. I simply countersunk some screws right through the frame into the studs in the wall. Putty up the holes and do some touch-up paint.

We keep some chalk in a jar, and made sure to mount it not above carpet, so the chalk dust can be easily wiped up. I have as much doodling on it as the kids do!


8.30.2012

HELLO Entry Signage

We have lived in our home for 2 1/2 years now, and up until this week, our entry wall has been bare. I always wanted an entry that was cheery and inviting, but plain beige walls, were not the most welcoming sight. I thought about simply cutting a board and painting or doing vinyl that said "Welcome" but that was too typical for me. So I came up with this instead:

I just bought unfinished wood letters, painted them white, and distressed the edges a smidge.

Then, using Command's picture hanging strips (the velcro-like ones) I mounted them on the wall. The strips make the letters pop away from the wall just a tad, adding a little more dimension, which I love.

Hopefully now, when people come over, they will feel happily welcomed into our home!


What do you have in your entry?

6.28.2012

Pallet Wood American Flag

Back in April I had this vision of a pallet wood American flag. Well actually, at first it was going to be a store bought wood flag, but I really wanted the distressed look to it. Then I realized, rather than me roughing up some smooth fresh boards, why not use boards that are already rough. So, the kids and I went pallet hunting. 

That thing was clean compared to the other options, but it still was quite dirty. I hammered and tugged and jumped on it until I got all of the boards separated. I ended up with 9 usable boards. Then I had to remove all of the gross nails. Then I sanded off the dark and dirty spots so that the paint would adhere good. I cut two of the boards down to 24" to put on the back to nail the front boards to- I just used the preexisting nail holes on the outer edges when I nailed it all together. The flag measures 25" x 40". 

I did all my work on the garage floor. I dream of a day when I can have a work bench with all of my tools in their own glorious places, but for now the floor works just great!

Then I gave it a rough while painting. I didn't worry about it being thick on the upper left corner because that would get painted blue.


Then, I taped off my stripes, and painted in between them red. After the red was dry, I taped off for my blue section, painted it and let it dry. After it was all dry and tape was removed, I sanded it all down to expose some wood and some of the white paint underneath. It looks nice and rustic and very patriotic.


I've considered putting a star in the upper corner, but until I figure out  the right one, I think it looks great just simple and plain.

10.27.2010

Giant Ruler Growth Chart

As a parent, it is so fun to see how your child is growing... though I often wish they would stop growing and stay little forever. Alas, they continue growing. So why not keep track and remember how little or big they are as they grow from a little infant to an independent child. There are so many growth charts out there. Many are really cute and unique, and you can find them to match practically any decor scheme. I however, wanted something simple, that wouldn't scream "child's growth chart!" So I set out to make one.

I went to a two stores, Home Depot & Michaels, and grabbed my supplies... thankfully those two stores are right next to each other.

Here's what you need:
3/4" x 10" x 6' wood board
Paint
1 pkg. black carpet tacks. They are about 3/4" tall and look like this:


Number stickers (mine are about 2" tall)
Scrapbooking tags (mine are circle tags with prepunched holes and sticky backs)
Ruler
Permanent marker


Instructions:

1. Paint your board and let it dry.
2. Distress your board (optional) I sanded the edges and then applied a brown watered-down paint to the exposed wood.
3.  I wanted my chart to measure up to 6'6", so I started my markings at 6". Lay a measuring tape or ruler on your board and use a permanent marker to mark every inch. Make the foot markings larger.
4. Apply your number stickers next to your foot markings
5. Securely attach to your wall at the correct height from the floor. (ie. I started my board at 6", so I attached it to the wall 6" above the floor.) Make sure it is level and straight.
6. As your child grows write their name, age, and height on a tag, and attach to board using a carpet tack. 
The best part is that you can take it with you if you move, without having to tear out a door frame!


Linking to:
Black Kats  Design

giveaways

Get your craft on Thurs.


9.04.2010

Sunburst Mirror

Once I finally found and completed our bedding ensemble, the next task was filling the space above our bed. We don't have a headboard as of yet, and I knew exactly what I wanted above the bed. So far, the rest of the items in our room are all square, and straight. So a sunburst or round mirror of sorts was what I envisioned. Everytime I found one I liked, I always reasoned with myself that it wasn't perfect for the price. Then I stumbled upon Sweet Something Designs tutorial for a sunburst mirror. It was destiny! I ran out the following morning to buy my supplies. I crafted during the kiddos naptime and after they went to bed at night I finished it up. In the morning I hung it on the wall and am in love. I'm not sure if I'm totally sold on the color, but that can easily be changed... however the room really needed something metallic so it really looks great.


So thank-you Michelle for filling the void with your crafty tutorial!

3.13.2009

Gone Fishin'

With the amount of rain we're receiving down here in Texas, we'd probably only have to walk a few feet to find a fishing hole! Since the weather is so wet outside, I've been doing some Spring cleaning. One thing that needs to be dejunked is my computer... pictures, pictures galore! I came across pictures of this project I made for K's first birthday (that was 8 months ago!) I guess I forgot to post it on here. Here she is in all her scaley grandure:
I made her out of materials I already had sitting around, except for the wheels. I sketched a fish shape on some scrap wood, had free reign of my dad's plethora of wood-working tools, and made this fun toy for a then beginning walker.
I think she turned out pretty cute. K loves to try and see how fast she can go around corners without Ms. Fishy tipping over...

2.13.2009

Feminine Frills

After finding out we were having a girl, the bow buying began. Granted, I don't have many bows compared to most mommas, but I did have enough that they were becoming a mess. I had them clipped on a ribbon tied to a hanger for a while... and knowing me, that had to be fixed into something cute. So I made this handy-dandy bow and headband holder. I wish I would have made this before she was born, because we had TONS of infant headbands. Sadly, those are now packed away with all her other little things. It was a VERY easy project- so any of you momma's with girls can make it in a jiffy. I bought the wooden sign with hooks already in it- you should be able to buy these at most craft stores. I painted the edges and then modge podged on some scrapbooking paper that matched her room. Then I added two long ribbons to attach bows to. You can staple gun them on, use short nails, or perhaps duct tape them on. I heat finished the ribbon's edges to prevent fraying. Now hang up all your headbands, bows, or even jewelry and all your frills will be organized.

5.23.2008

Friday Finale

For sake of completing a post this week, amongst the many things that have kept me busy, here are some projects I've been up to...of which I LOVE!
I had been looking for some wooden blocks for K, but hadn't found any that I thought were cute enough or for the right price. So here are the blocks I made for her. The blocks were $2 and the paper were some scraps I had in my stash. She loves them!

I had posted this dress on my family blog, and it has finally found its way onto this one. I learned how to smock and this was my first project. Overall the project cost 38 cents and 20 minutes! Love that :)

My sister gave me these shorts to try and sell to Plato's Closet- they said they were and older label (don't they still sell ones almost exactly like this at the store?!!) Anyways, since they wouldn't give money for them and I thought the fabric was perfect, I used it to make a summery ruffle top for KiKi. I think I may make some matching lounge pants with a ruffle at the bottom.

These "M.C. Hammer" pants as Dave calls them, were made without a pattern and on a whim... next time I will do some things differently. Overall they turned out cute, and a good thing is that they are short enough that K doesn't stumble on them while walking.

Last are these simple lounge pants with ric-rak on the bottom. After making them and K wearing them to playgroup, I discovered that they are a bit long, next ones will be a bit shorter. They are nice and lightweight for summer.

1.26.2008

Wooden Sign

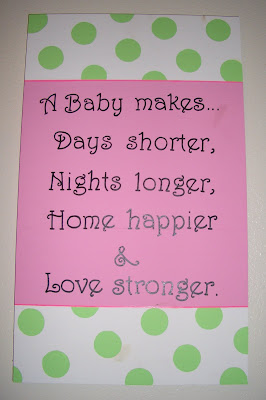
I always saw many cute wall hangings at boutiques, so I decided to make one for K. They do wood cuts at Lowes for $.25 and then I just painted the rest. I matches her bedding so cute!

Wall Hangings

Here is a picture frame that I painted and distressed. There is a pink ribbon that it hangs from. We have three of these hung together- one of daddy as a baby, one of me as a baby, and one of K as a baby. Distressed edges.
This is what the frames hang from. I painted these and added the line & dot detail.

Wooden Name Letters

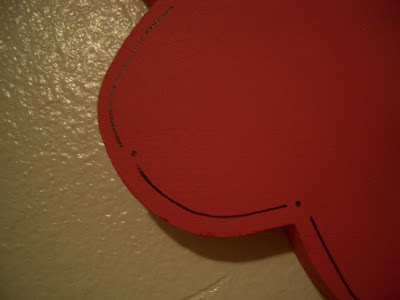
This one shows the destressing on the letter edges.

Amazon Affiliate