I have always wanted to make a diaper cake. They look so fun all loaded up with baby goodies. The problem is that I would always come up with something that the new mom would need for their boy or girl... a personalized onesie, a ruffled dress... But when it comes to the mom that already is stocked for both a boy and girl (because they already have one cute son, and one darling daughter) I figured the thing this momma really needed was diapers. Buying a package of diapers and sticking it in a gift bag is just not how I roll. So the time finally came for me to attempt my first diaper cake (and I was secretly grinning inside with excitement to go gather all of the cute things and put it all together.)
Come join me as I make my cake!
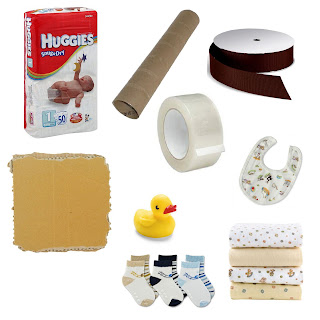
First, I gathered the following items:
This is for a medium sized, 3-tiered cake. If you want to make a smaller one, buy less; if you want to make a bigger one, buy more of each item.
1 package of size 1 diapers (50 count)
1 empty paper towel tube (half of a gift wrap tube works too)
a scrap piece of cardboard to make about a 12" circle (I cut mine out of another diaper box)
packing tape
spring form baking pans (optional but VERY helpful)
grosgrain ribbon
curly ribbon or string
1 flannel receiving blanket
baby goodies (I used 2 pairs of socks, 3 bibs, 2 rubber animals, 1 baby ball, and a bottle cleaner. Other ideas include teethers, rattles, bows, diaper cream, etc.)
roll of tulle
1. Cut 1/2" slits on one end of your cardboard tube
2. Bend slits out and center on cardboard circle. Using packing tape, secure tube to circle base.
3. Remove bottom of spring form pan and place it around your cardboard base. (This picture doesn't have the circle cut yet, I took this picture after finishing my first cake because I didn't take pictures of this step.)
4. Fold your receiving blanket to approximately match the height of your diapers. This doesn't have to be perfect. Wrap the blanket around your tube and use a pin to temporarily secure in place. This step helps add thickness to the first layer. If you want it wider, add a second blanket.
5. Take 25 of your diapers and fan them out around the blanket, using the pan to help you keep it circular and tight.
6. Tie your grosgrain ribbon tight around this layer of diapers. Remove pan.
7. Place a smaller spring form pan on top of this layer. Using 19 of your diapers, create a second layer fanning the diapers as you did in the first tier. Secure with grosgrain ribbon and remove pan.
8. Using the remaining 6 diapers, stand them up tall (you can do them on their side like the previous layers if you like that look better) and fan them around the remaining cardboard tube and tie with ribbon. It should now look like the picture above.
9. Now the fun part begins! Tuck in baby goodies around cake. Stick them in the ribbons, tie them on the extra length of grosgrain, or use curly ribbon or string to secure bulky items (if you look closely you can see it tied around the rubber animals.) I stuck a bottle cleaner in my cardboard tube to act as a cake topper.
10. If necessary, trim the cardboard base. Use the roll of tulle to wrap your cake- this helps keep everything together and even more secure.
11. Head to the baby shower and show off your Kreation!!
Now I excitedly await the arrival of this new boy into this sweet family! Congrats W family!


No comments:
Post a Comment